10 Mixing Mistakes That are Easy to Fix
This guide explains ten common mixing mistakes that can mess up your mix. Learn how to identify these mixing pitfalls and how to correct them.

What is Mixing?
Audio mixing is the process of combining multiple layers of audio to make one final track. The mixdown process makes sure all the parts in a song sound good together. Mixing involves balancing levels, panning sounds, equalizing, compressing, harmonics enhancing, fixing problems, and adding various effects. Mixing also involves automation, editing sounds in creative ways, and giving instruments their own space in the mix. The goal is to sculpt a balanced and unified arrangement ready for mastering.
Common Mixing Mistakes
Learning how to mix is challenging. There is an abundance of mixing tools and techniques . Plus, crafting a great mix takes time, effort, and skill. There’s no shortcut to mixing mastery, but there are several pitfalls worth avoiding along the way. Here are ten common mixing mistakes you should know when learning how to mix:
1. Mixing in Solo
Clicking the solo button and mixing tracks in isolation is not the best approach for making mix decisions. This habit is hard to break because it’s easier to hear a sound in isolation. However, a track that sounds awesome soloed may not sound as great when all the tracks play together.
Mixing in solo shifts your focus to making that track sound amazing on its own rather than making it fit in the mix. The goal is to make all the tracks in a mix sound great together. So, try to make mix decisions in context while all the layers are playing simultaneously. If it’s hard to hear the part you’re working on, raise the level fader until you get it sounding good. Then re-balance the levels after processing.
2. Forgetting About Stereo Width
Stereo width is essential to great-sounding mixes. It’s vital to give your mix a sense of dimension by placing different elements within the stereo field. The most effective way to create stereo width is by panning.
Like EQing, panning can give sounds their own space in the mix. It’s an easy way to add separation between various sounds. Conversely, keeping everything panned center will affect clarity, presence, and definition. It also introduces frequency conflicts. In addition, your mix will sound dull and boring.
Be careful when panning. Elements panned too wide may sound weak or inaudible on mono speaker systems. And as a general rule, keep your low-frequency elements center. For example, keep the kick and lower bass frequencies mono. Keeping low-frequency elements center retains punch, clarity, and power. It also reduces phasing issues and allows the low-end to translate on mono speaker systems. It’s also common to place the snare, lead vocals, guitar, and anything else that is the focus of attention near the center. Conversely, high-frequency elements are safe to pan wider across the stereo field.
3. Squashing Dynamic Range
Dynamic range is the difference between the loudest and the quietest parts of an audio signal. Dynamic range is essential for creating a mix that breathes, sounds natural, and is not ear fatiguing.
The most common way to control dynamic range is with compression . Applying compression reduces dynamic range, controls transients, shapes tone, glues sounds together, makes them sound louder, and more. However, over-compressing a mix reduces clarity, punch, and dynamic expression. It also fatigues your ears and limits resources for the mastering process.
For best results, avoid squashing the life out of your mix and individual sounds. Instead, try applying subtle amounts of compression at different stages. This technique spreads the workload over multiple compressors instead of a single compressor doing all the work.
4. Not Checking the Mix in Mono
Checking your mix in mono is vital. Listening to your mix in mono helps identify issues with the stereo image, phasing, volume, clarity, and more. Mixing in mono also helps ensure your song translates on mono speaker systems.
Check your mix in mono by inserting a mono utility plugin on the master at the end of the device chain. Playback the mix and switch between mono and stereo to identify mix problems.
5. Not Using Reference Tracks
Reference tracks are commercial ready songs that have been mixed and mastered. They’re used as a tool to either measure your mix against or as a roadmap to guide your arrangement.
Referencing is one of the best and most helpful mixing techniques to learn. Comparing your mix to a commercial ready track will help you achieve pro-sounding mixdowns and masters.
Reference tracks also guide your mix decisions. Quickly switch between your mix and a reference mix to help you identify what’s lacking. This technique is an easy way to reveal problems you may not have noticed.
6. Not Checking the Mix on Different Speakers
It’s vital that your mix translates on various speaker systems. Listen to your mix on several types of speakers. For example, check your mix in the car, on your laptop, headphones, smartphone, home stereo, etc. This technique will help you identify mix problems.
Also, take notes! After fixing any problems, test your mix again to ensure it sounds good on different sound systems.
7. Lack of Headroom
Managing your levels at every stage throughout the signal chain is vital. Gain staging ensures the audio signal flow is at an optimum level as it passes through the various processors and mixer stages. No track should be clipping! Also, check the master level to make sure your mix has enough headroom for mixing or mastering.
Check your track volume levels. Maintaining optimal levels prevents overloading the master. For best results, keep the master volume fader at ‘unity’ which is 0 dB. Also, try to keep the master volume level at about -3 to -6 dB when mixing. These level averages ensure you have enough headroom for the mastering process.
Monitoring the input and output levels of devices is also crucial. Avoid running a ‘hot’ signal into a plugin. Overloading a plugins input signal will give you poor results. Ensure there’s enough headroom for the plugin to process the audio. A plugin that’s clipping will affect all other plugins that come after it in the device chain.
Most plugins have an output gain control to adjust the output signal level. Many even have an input control to adjust the incoming signal level. Use these controls to balance levels across the entire device chain. If the plugin doesn’t have an output control, insert a gain plugin after it.
8. Monitoring Too Loud
Our ears perceive louder as better. That’s why it’s tempting to crank up the monitors while mixing. However, mixing at high volumes is damaging to your mix and hearing.
We hear frequencies differently at various volume levels. For instance, increasing volume accentuates lower and higher frequencies. That’s why everything sounds better loud. Mixing at high levels will make you think the music sounds amazing for the short term. That’s until you turn down the volume and discover it sounds unbalanced. Conversely, if your mix sounds great at lower levels, it will still sound great when you crank the volume.
Also, at high sound pressure levels (SPLs), your ears become fatigued. Instead, mix at lower levels. You’ll be able to mix longer without ear fatigue. You will also make better mix decisions when louder levels are not tricking your ears. Reserve cranking the volume up for pleasure or quick referencing.
9. Not Checking for Frequency Masking
Two or more sounds that occupy a similar area of the frequency spectrum compete for space within the mix. Sounds with competing frequencies is a phenomenon known as frequency masking. Masking causes frequency conflicts that make it hard to hear two or more sounds clearly. It also creates various other mix issues.
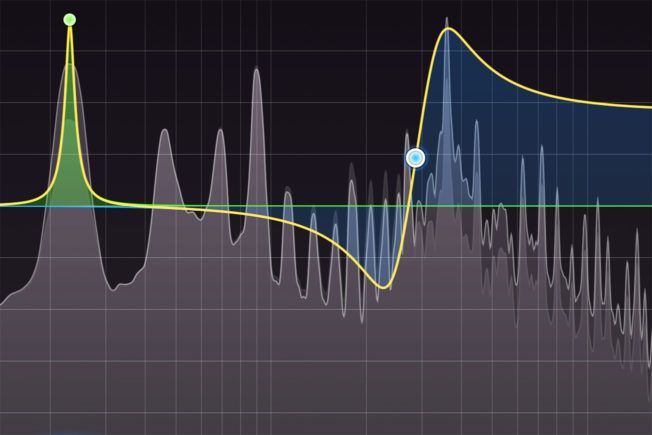
Sometimes it’s easy to hear when two sounds are competing. Other times, visual assistance can be helpful. Many spectrum analyzer plugins such as Voxengo SPAN have a feature that enables you to see multiple frequency responses. This feature helps you compare two or more sounds and identify the conflicting frequency areas.
10. Not Checking for Phase Problems
It’s crucial that you fix phase problems. Phase cancellation is an audio phenomenon that occurs when similar waveforms work against each other. Waveforms with the same frequency cancel each other out when they are out of phase. For example, if two identical signals are 100% or 180 degrees out of phase, they will completely cancel one another if combined.
Phase issues also cause elements in the mix to sound weak, thin, and hollow. Moreover, phasing causes sounds to lose volume, punch, and even disappear in the mix. Phase cancellation is a serious issue, and there are various reasons it occurs.
Check for phase issues with a phase metering plugin such as Voxengo Correlometer or by switching your mix in mono. Insert your metering plugin on the master or on single tracks to diagnose phase problems.
Bonus: Not Taking Breaks
Our ears get tired, and they become fatigued from long studio sessions. Ear fatigue leads to making mix mistakes. It’s crucial to give yourself 20 or 30-minute breaks every two hours or so. It’s also good to take longer breaks from a song. For example, take a day or even a week away from your song. When you come back to it, you’ll have fresh ears and will be able to hear details that weren’t noticeable before. Taking breaks also helps you reset and get back to being productive.


