Learn How to Improve Your Mix with Spectrum Analyzers
What are spectrum analyzers? Learn how to use spectrum analyses to identify problematic frequencies, balance a mix, measure room acoustics, and more.
Mixing with Spectrum Analyzers
Getting your mix to sound great and translate on different speaker systems can be challenging. Especially without a proper listening environment and a decent monitoring system.
Your ears are the best tools you possess for making music. Trusting your ears is essential. However, certain times require visual insight into the frequency makeup of a mix. Using a spectrum analyzer can show you frequencies which are inaudible or difficult to perceive. They also help you make mix decisions without the influence of room acoustics, monitor limitations, love for the song, and other factors.
What is a Spectrum Analyzer?
A spectrum analyzer is a measurement tool that displays real-time frequency analysis of incoming audio signals. Spectrum analyzers display the results in a graph. The horizontal axis shows frequency and pitch measured in Hertz. The vertical axis shows the amplitude of those frequencies measured in decibels.
A variety of spectrum analyzers offer different and useful features. Many EQ plugins also include integrated spectrum analyzer displays. Besides your DAW’s stock analyzers, there are also excellent spectrum analyzer plugins available. Check out iZotope Insight, MeldaProduction MMultiAnalyzer, and Voxengo SPAN.
What is the Frequency Spectrum?
The frequency spectrum represents the range of audible frequencies. The typical human hearing range is 20 Hz to 20,000 kHz.
Many charts divide the frequency spectrum into seven bands. These bands describe the tonal qualities of each frequency range. The seven frequency bands are:
- Sub-bass (20 Hz – 60 Hz)
- Bass (60 Hz – 250 Hz)
- Low Midrange (250 Hz – 500 Hz)
- Midrange (500 Hz – 2 kHz)
- Upper Midrange (2 kHz – 4 kHz)
- Presence (4 kHz – 6 kHz)
- Brilliance (6 kHz – 20 kHz)
How to Use Spectrum Analyzers
Audio spectrum analysis is a useful aid in music production, mixing, and mastering processes. There are several ways to use a spectrum analyzer.
Learn how to use a spectrum analyzer to improve your mix or listening environment with these five methods:
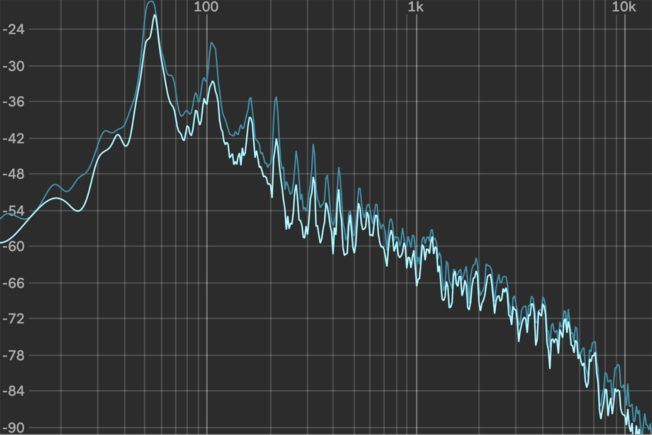
1. Identify Resonance Problems

Resonance is a buildup of energy at a particular frequency. Some resonances sound pleasing and add to the character of a sound. However, unpleasant resonances cause problems.
Addressing harsh resonance spikes is crucial. They cause several mix issues and are unpleasant sounding. Resonances are easy to spot on a spectrum analyzer. They show up as sharp, narrow peaks in the upper midrange or broader bumps in the lower mids and lows.
Identify problematic resonances by inserting a spectrum analyzer plugin at the end of the device chain. Look for frequency spikes and address them with an EQ, filter, compressor, or other processing plugins.
Examining resonance peaks is also helpful for finding the fundamental frequency of a signal.
2. Identify Unwanted Low Frequencies and Rumble
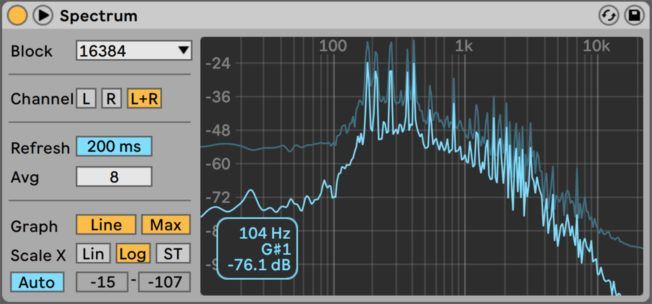
Poor listening environments or monitors that don’t reproduce the lower spectrum make it hard to identify problematic low frequencies. Figuring out where to highpass filter sounds with excess low frequencies or rumble can be tricky sometimes. Set the cutoff frequency too low, and you risk leaving frequencies that cause issues. While cutting too much robs the sounds fullness and body.
A spectrum analyzer can help you spot unwanted frequencies. Insert a spectrum analyzer plugin at the end of the device chain. Next, playback a section of the song where the track plays its lowest note or chord. Look for the lowest frequency bump on the analyzer’s display. This bump represents the sounds fundamental frequency. You can safely cut anything below it without affecting the body and timbre of the sound. This technique also works for identifying and cutting excess high frequencies.
3. Compare Two Frequency Responses
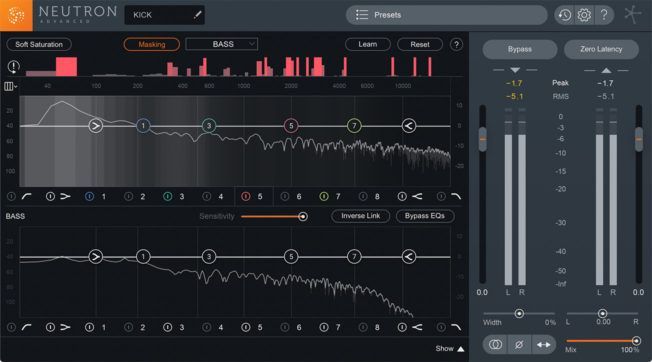
Ensuring the different elements in a mix are not conflicting with one another is crucial. Each sound in the mix should occupy its own sonic space, both in the frequency spectrum and in the stereo field.
Two or more sounds that occupy a similar area of the frequency spectrum often compete. Sounds with competing frequencies is a phenomenon called frequency masking. Masking makes it hard to perceive two or more sounds clearly. It also causes various mix issues.
Sometimes it’s easy to hear when two sounds are competing. Other times, visual assistance can be helpful. Many spectrum analyzer plugins have a feature that enables you to see multiple frequency responses. This feature helps you compare two or more sounds and identify the conflicting frequency areas.
This method requires a spectrum analyzer plugin that has an external sidechain input. Insert the spectrum analyzer plugin at the end of the device chain. Then, route the signal from the track you want to compare into the plugin using the sidechain input. After identifying the problem areas, use an EQ to achieve separation and clarity.
4. Examine the Tonal Balance of a Mix
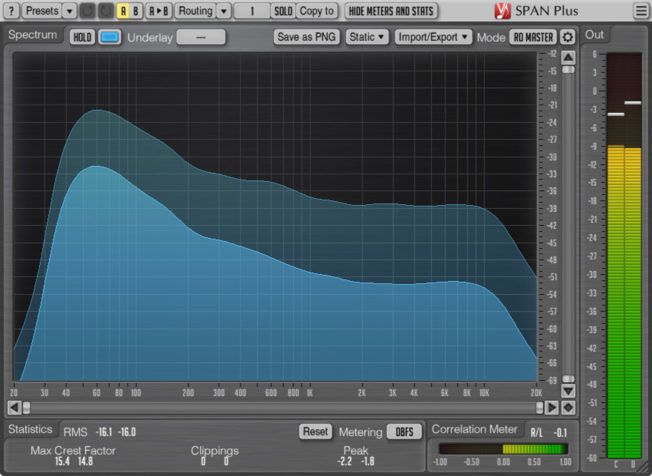
Tonal balance describes the relative distribution of energy across the frequency spectrum. The interaction of all the parts of a song contributes to the overall tonal balance. It’s also responsible for the perceived timbre of a mix or sound. Moreover, tonal balance is key to a great-sounding mix that will translate across different speaker systems.
A tonally balanced mix has a reasonably consistent frequency response. It also has perceived equal loudness across the frequency spectrum. Conversely, a mix with poor tonal balance may have noticeable peaks and dips in the frequency response. For example, an emphasized low-end or a lacking midrange. Lower frequencies should blend smoothly with higher frequencies.
Spectrum analyzers are the primary tools for monitoring the tonal balance of a mix. Insert a spectrum analyzer plugin at the end of the device chain on the mater channel. Then, set the spectrum response to a slow speed so it displays an average reading. A slower response time averages short-term peaks and shows a smoother frequency curve. When observing the analyzer, look for significant peaks or valleys. Then address these areas in the mix with an EQ.
You can also use a spectrum analyzer when mastering to compare your song to a commercial reference track. Route the reference song into the analyzer to compare its frequency response to your mix. This technique will help you get your mix to a commercial level.
5. Measure Rooms Acoustics
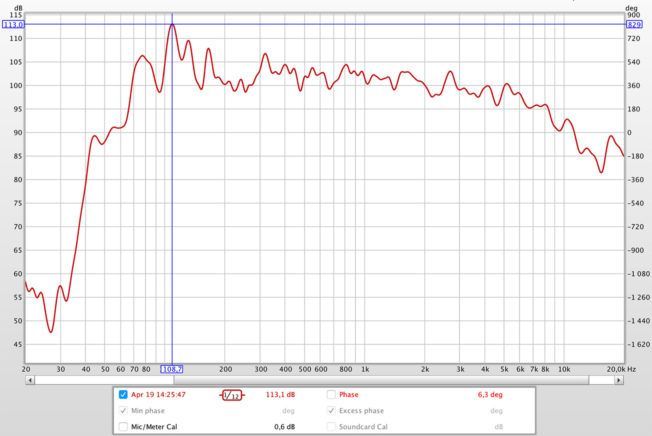
You can use spectrum analysis to help reveal the frequency response of your listening environment. There are several acoustic measuring tools and methods used to analyze the frequency response of a room. Knowing the unique frequency curve of your room is useful. It helps you know where to compensate for the bumps and gaps when mixing. It also reveals how your room acoustics are affecting your mixes. Installing acoustic treatment may be an option to look into if you have a poor listening environment.
Conclusion
The visual feedback that a spectrum analyzer provides can help you make better mixing decisions. However, trust your ears and use visual feedback as a supporting tool to confirm what you hear or don’t hear.
Over time and with experience, your ears will tell you what needs attention. Until then, use spectrum analyzers to guide your mixing and mastering decisions.

MORE ARTICLES FROM THE ICON BLOG


