How to Do Proper Gain Staging in Your Daw
What is gain staging and how can it improve your mixdowns. This guide gives you a better understanding of digital gain staging and offers five tips to boost your mixing skills.
What is Gain Staging?
One crucial and often overlooked step in the mixing process is gain staging. What is gain staging? Gain staging is a process of managing levels at each stage of the signal path. It ensures the audio signal flow is at an optimum level without clipping as it passes through the various processors and mixer stages. Proper gain staging also gives your project enough headroom for mixing. Moreover, it helps improve the sound quality of your mixdowns.
Cool, but what is the signal flow? Signal flow is the path an audio signal takes from source to output. For example, the signal originates from an instrument, sample, mic, or other outboard gear. It then travels through each plugin in the device chain before reaching the track volume control. The output signal from the track mixer will then travel through either a group bus or into the master track. From there, the signal may run through a mixing board or sound card.
How to Gain Stage
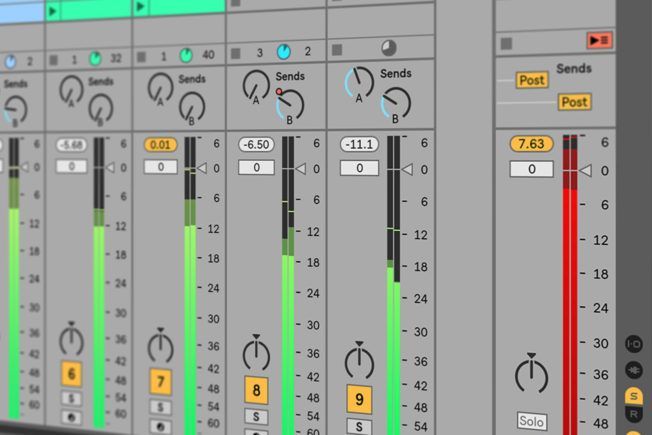
Gain staging is an integral part of recording and mixing. Managing volume levels within a project lend to a quality sounding mix. Moreover, maintaining the gain structure ensures your mix has sufficient headroom and dynamic range. It also prevents signal clipping at every gain stage. Clipping introduces nasty digital distortion that will make your mix sound bad. In the digital world, it’s critical not to overload your devices and track levels. Red is bad mmmk!
Implement the practice of gain staging in your projects with these five tips:
1. Monitoring Device Inputs and Outputs
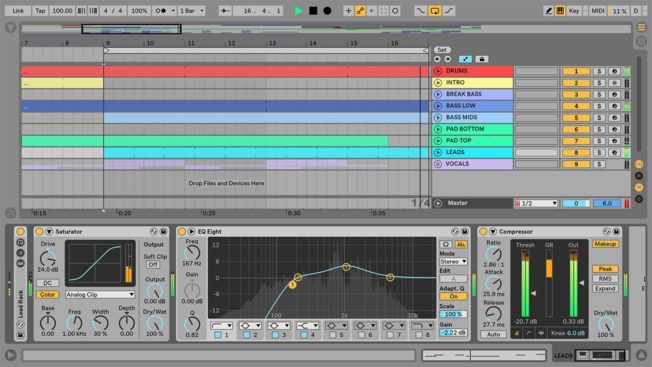
Monitoring the input and output levels of devices is crucial. Avoid running a “hot” signal into a plugin. Overloading a plugins input signal will give you poor results. Ensure there’s enough headroom for the plugin to process the audio. A plugin that’s clipping will affect all other plugins that come after it in the device chain.
Most plugins have an output gain control to balance output signal level. Many even have an input control to adjust the incoming signal level. Use these controls to balance levels across the entire device chain. If the plugin doesn’t have an output control, insert a gain plugin after it.
2. Level Matching Devices
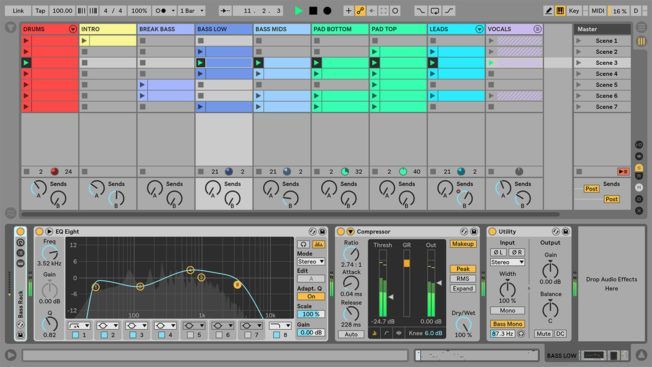
Most plugins change volume levels. Depending on what the plugin is doing, it will either increase or decrease the level. It’s essential to maintain the same perceived levels at the input and output of every plugin in the chain. This step allows you to accurately assess whether the plugin is improving the sound or making everything louder. It also ensures the track level remains consistent when bypassing an effect. The perceived volume level should stay the same after deactivating any plugin in the chain.
For example, a plugin that increases perceived volume may trick your ears, making you think everything sounds better. Find out whether the effect improves the sound or makes it louder with these two steps:
First, balance the output level to the match the input level.
Second, A/B the effect by turning it on and off to hear the results. If you think the effect adds to your mix, move on to the next task.
3. Attenuate Source Sounds

Monitor the output level of instrument plugins and track levels with a connected hardware instrument or mic. First, ensure the output is not clipping. Second, give yourself enough headroom to process the signal with effects.
Also, many processed samples will play at maximum volume. Decreasing a sample’s clip volume will give you headroom for processing.
4. Monitoring Track Levels
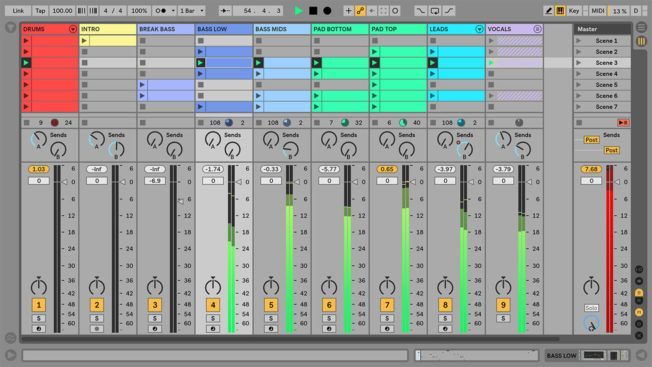
Maintaining healthy track levels is vital. The master output level is the sum of all the individual track levels. This buildup in volume can make your master level clip. If the master is clipping, reduce all the track levels instead of lowering the master volume. Also, make sure to give yourself plenty of headroom for mastering.
For best results, keep the master volume fader at “unity” which is 0 dB. Also, try to keep the master volume level at about -3 to -6 dB when mixing. These level averages ensure you have enough headroom for the mastering process. It’s also a common practice to keep track volume levels between -10 to -18 dB. This range provides optimal levels and prevents overloading the master. You can also keep track volume faders at 0 dB for the highest resolution and then use a gain plugin to adjust levels. Lastly, turn up your monitors if your mix is too quiet.
5. Gain Automation
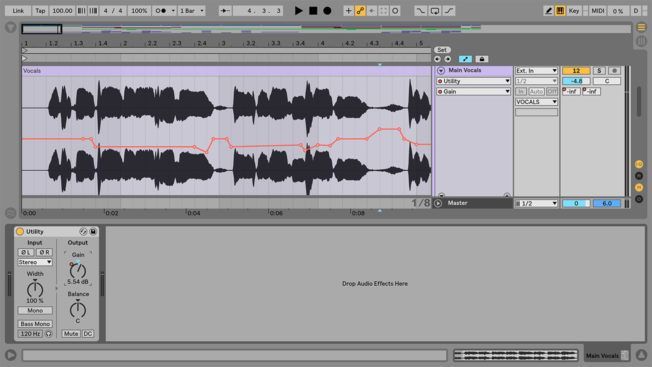
Sounds with drastic changes in dynamics will give you quite and loud levels. Instead of compressing or limiting the signal to get a consistent level, try automating the gain. Use a gain plugin and automate the volume. Increase the volume of quiet parts and decrease the volume of the loud parts to get a more balanced output. This technique gives you more control. It also works excellent on vocal tracks.
Conclusion

To sum up, pay attention to levels at every stage and give yourself sufficient headroom. Green levels are good and red is bad. Also, use a gain plugin when there are no input or output controls available. Lastly, use meters to monitor levels. Many DAWs come with RMS and Peak meters. You can also try VU meters. These analog-style meters are much slower and measure the average level, rather than each peak.

MORE ARTICLES FROM THE ICON BLOG


