15 Easy Tips for Recording Vocals Like A Pro
Learn how to record studio-quality vocals. These 15 tips for recording vocals will boost productivity and help you capture the best vocal performance.

How to Capture Better Vocal Recordings
When people listen to a song, they pay attention to the vocals the most. That’s why it’s vital to produce pro vocals that sound great.
Recording vocals is an essential part of producing a song. However, it takes a lot of work to create a great sound. Plus, there are many variables involved in recording the perfect vocal performance.
This guide will help you prepare for a vocal session and ensure everything runs smoothly in the recording studio.
15 Tips for Recording Vocals That Sound Professional
A great vocal performance can take your song to the next level. It’s vital to prepare your vocal sessions to get the best possible performance.
Recording vocals that sound professional involves many steps. Consider these 15 vocal recording tips during your next vocal session:
1. Learn the Song’s Arrangement and Key
Before the session, make sure the singer knows the song inside out. The singer and producer must be familiar with the song before recording to avoid wasting time.
Go over the song’s fundamentals like the tempo, key, melodies, harmonies, and lyrics. Also, become familiar with the arrangement and various sections like the verse, bridge, chorus, breakdown, etc.
Understanding the song will lead to a smoother and more efficient recording session.
2. Make Sure the Singer Knows Their Vocal Range
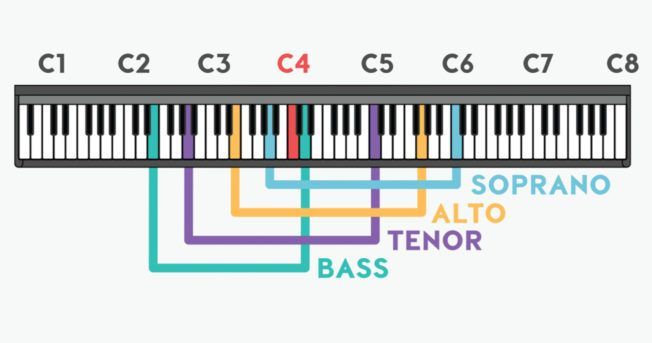
Good singers will know how to find their vocal range before recording a song.
What is vocal range ? Vocal range refers to how high and low a performer can comfortably sing. It’s the distance between the highest and lowest notes a singer can produce without straining their voice.
Knowing the singer’s range will help determine the best songs and musical key for their voice. Always check the vocal range of the singer to ensure the song key works for them.
If not, you must change the key of the song or choose another song. It’s best to send the song to the singer before the session. Allow the singer to rehearse and become comfortable singing the song.
[yuzo id=”13031″]
3. Consider Room Acoustics and Sound Treatment
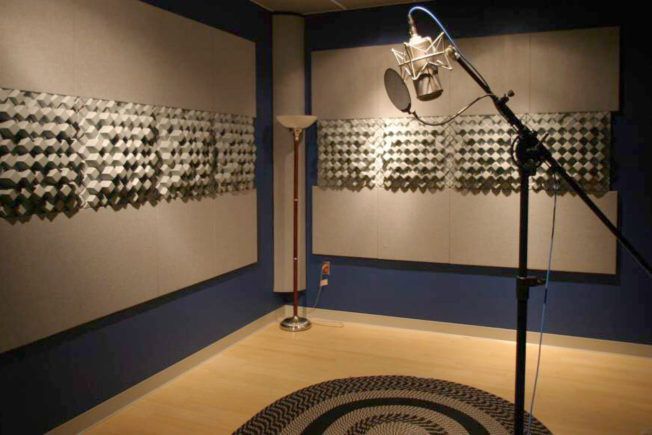
Poor room acoustics will cause problems and affect the quality of your vocal recordings. Treated rooms reduce unwanted noise, ambiance, and sound wave reflections that interfere with the recording.
For best results, consider adding sound treatment to control sound reflections in your studio. A combination of acoustic panels, absorbers, diffusers, and bass traps will create an optimal recording environment.
However, you don’t need to spend a fortune on proper acoustic treatment or a professional vocal booth. Many DIY solutions can improve your home studio acoustics. These tips will enhance the acoustics of your recording space:
- Record in a smaller room to reduce reverberance and standing waves.
- Use thick carpet or rugs to adsorb or reduce floor reflections.
- Place furniture in the room to absorb sound waves.
- Hang dense material on the walls like rugs, blankets, and foam to absorb sound waves.
- Cover windows with curtains to prevent reflections.
- Hang sound-absorbing fabrics from the ceiling to absorb sound waves.
- Place foam wedges or sound-absorbing objects in corners to reduce frequency buildup.
- Hang or place objects without smooth surfaces to diffuse or scatter frequencies.
- Create a temporary vocal booth with mattresses.
The goal is to control sound reflections to improve the quality of your vocal recordings. Capturing a ‘dry’ and clear vocal performance will also make it easier to edit and apply sounds effects.
4. Make Sure the Singer Warms Up Their Voice

It’s essential the singer warms-up their vocal cords before recording.
Vocal warm-ups are exercises that prepare the voice for singing. Whether recording in the studio or performing live, vocal warm-up exercises are vital for achieving the best performance.
Vocal exercises are also an integral part of improving, developing, and protecting the singer’s voice. A professional singer will use several effective vocal warm-ups.
Also, studio sessions can be expensive, and time is valuable. Ensuring the singer’s voice is ready to go will save time, make the recording session run smooth, and improve the quality of the performance.
5. Maintain Vocal Health and Get Rest

A singer’s vocal cords are their instrument. Maintaining good vocal health will protect their voice, improve voice quality, and help sustain longevity.
Singers should refrain from practicing extensively or pushing their voices hard before the session. They should also avoid alcohol, coffee, and dairy products before a session. These beverages can cause dehydration, reflux, or excess mucus. Instead, drink room temperature water and stay hydrated.
Quality sleep is also vital before a studio session. Fatigue can cause poor voice clarity, diminished tone quality, loss of volume, and reduced energy to perform 100%. It also increases the chances of vocal damage and strain.
6. Choose the Right Microphone for the Singer’s Voice
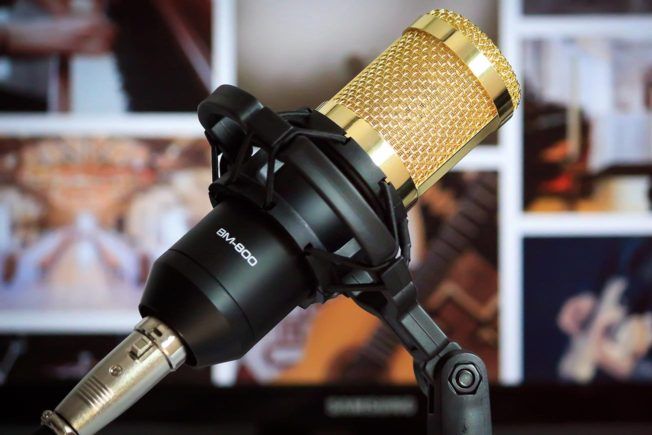
Matching the microphone to the vocalist ensures you get the best tone for their particular voice. Each microphone has its own unique and colorful character that contributes to the tone of a recording.
The type of microphone used will make a difference. However, there is no best microphone. Certain studio microphones reproduce sound differently than others. The character of the singer’s voice can also give you varying results depending on the microphone choice.
It’s crucial to understand the subtle qualities of your singer’s voice and then choose the appropriate microphone. While there are many types, condenser and dynamic mics are the most common for tracking vocals.
Here are general perceptions about condenser and dynamic microphones:
- Small-diaphragm condenser microphones like the Rode NT5 sound bright and airy. They also have an excellent bass response. These mics are the best choice for capturing a detailed and natural sound.
- Large-diaphragm condenser microphones like the Neumann U 87 sound clean and focused. The frequency response also sounds balanced, which can make the vocal sound rich and vibrant. However, the larger diaphragm makes them more sensitive.
- Dynamic microphones like the Shure SM57 sound warm and aggressive. They produce less top-end, which is suitable for singers with a high-pitched voice. A dynamic microphone is also less sensitive than condensers. Therefore, they pick up less room noise and sibilance.
Recording studios around the world have a range of microphones that suit any situation. However, not everyone has the budget or access to revered microphones used by professional studios.
Instead, consider microphone modeling plugins. With a single hardware microphone and mic emulation plugins, you can access a dream virtual microphone collection inside your computer.
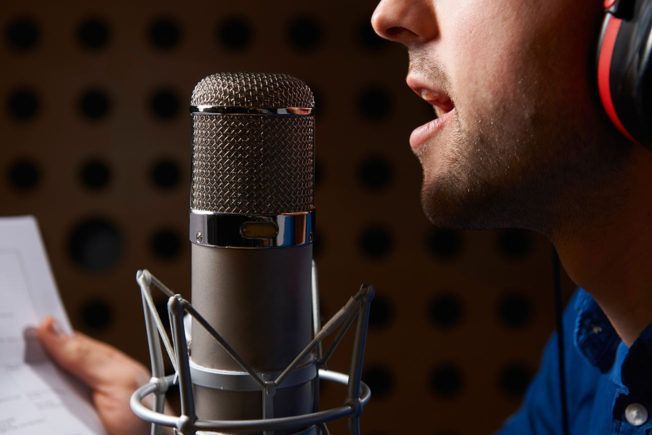
7. Properly Position the Microphone for Best Results

Before you record, ensure your microphone in the optimal recording position.
First, make sure the microphone is not in the center of the room and away from the walls. Finding the sweet spot places the mic away from standing waves that build up in the center of the room. It also reduces potential issues caused by room noise, reflections, and reverberance.
Next, adjust the height and angle of the microphone for the singer. Consider these microphone position tips:
- Make sure the singer is standing straight and facing the mic. Proper posture will give you a better performance.
- Start with the mic horizontal and six inches away from the singer’s mouth. This is the ideal default position.
- Lowering and tilting the mic upward toward the singer will accentuate the high-end.
- Aiming the mic downward toward the singer will accentuate the low-end.
- Singing closer to the mic sounds warm and more intimate. But you risk clipping if too close.
- Singing further away from the mic sounds airier and more spacious. But you risk losing clarity and detail.
- Try moving the mic 20 degrees to the left or right of the singer. Tilting the mic off-axis a small amount reduces sibilance and plosives.
Proper microphone technique is crucial for a good recording. The distance, height, and angle of your microphone placement can change the tone of the vocal recording.
8. Use a Microphone Pop Filter or Isolation Shield
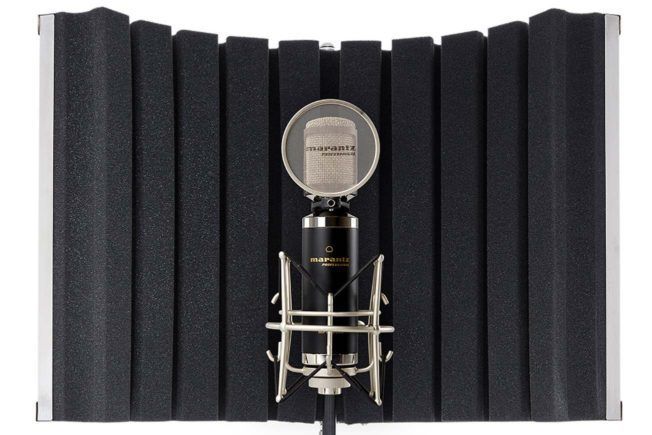
Use a pop filter and shock mount to tame plosive sounds. Plosives are the ‘pop’ sounds produced when singing ‘P’ or ‘B’ consonants. For optimal results, mount the pop filter about 3-6 inches in front of the microphone.
A microphone isolation shield reduces unwanted noise, ambiance, and sound wave reflection. It improves the sound quality of recordings by isolating the microphone from the surrounding environment.
Reflection filters have dense, uneven acoustic materials that dampen and absorb sound wave reflections. Eliminating unwanted noise and reflections will make your vocal recordings sound clear, dry, and balanced.
9. Choose the Right Headphones to Minimize Bleed
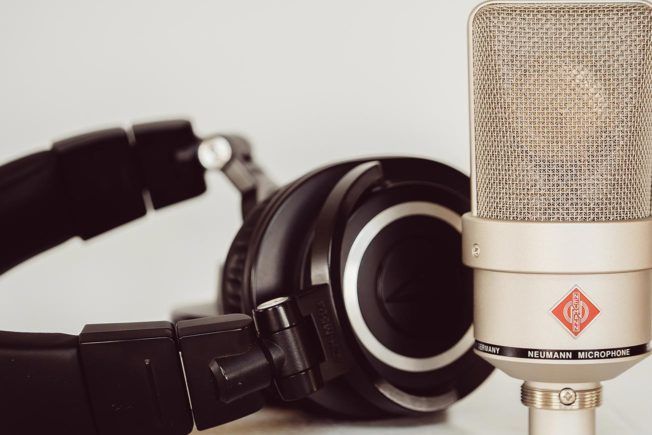
Bleed happens when the microphone picks up sound escaping from inside the headphones. Headphone bleed or leakage can affect the clarity of your vocal recording.
Prevent bleed by using closed-back headphones like the ATH-M50x . Closed-back cans fit over the ear and create a seal that keeps sound from escaping.
If you don’t have closed-back headphones, reduce bleed by keeping the headphone levels down.
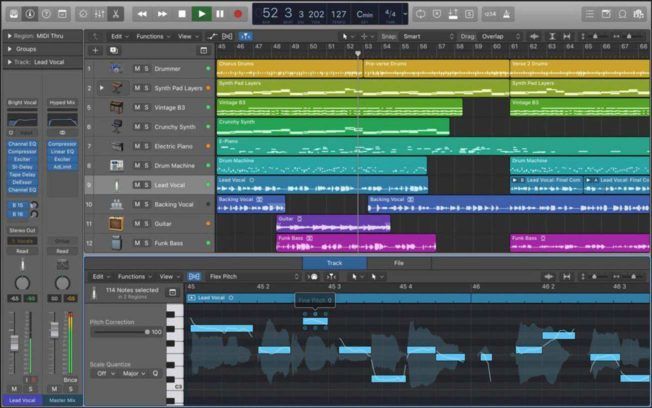
10. Prepare the Project for the Recording Session
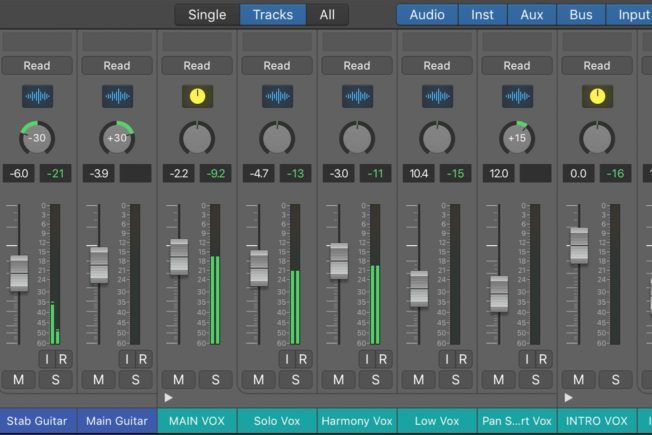
Before recording, ensure your project is ready and prepared for the session. Consider these tips when setting up your project:
- Load the correct project in your Digital Audio Workstation (DAW).
- Logically label tracks, bus groups, and song sections.
- Delete tracks and plugins you’re not using.
- Check the gain staging. Gain staging is the process of managing levels at each stage of the signal chain. It ensures the audio signal flow is at an optimum level without clipping as it passes through the various processors and mixer stages.
- Check the microphone levels. Have the vocalist sing into the microphone at various levels. Also, have them sing the loudest part of the song to make sure the levels don’t clip.
- Adjust the gain level on your preamp and audio interface to ensure the mic is not clipping. Try to maintain an average level of -18dBfs and peak levels around -10dBfs.
- Clipping is hard to fix, so leave some headroom on your vocal track. Give yourself 10dB of headroom on average to avoid potential clipping issues.
Preparing and organizing your project before recording will help prevent unexpected delays. It will also ensure the session kick-offs smoothly.
11. Control Breath Sounds when Recording Vocals
Breath sounds might get distracting in a recording session. They also detract from the quality of the performance.
For best results, have the singer practice proper breath control. Reducing excessive breath sounds will improve the quality and make the editing process easier.
However, a certain amount of breathing is also necessary to add a natural feel to the recording. Skilled singers will know what sounds natural.
The easiest way to reduce distracting breath sounds is by having the singer turn their head to either side with each breath. It’s also a good way to cut down the breath between spacious parts of the song.
12. Record Multiple Vocal Takes and Keep Them for Editing
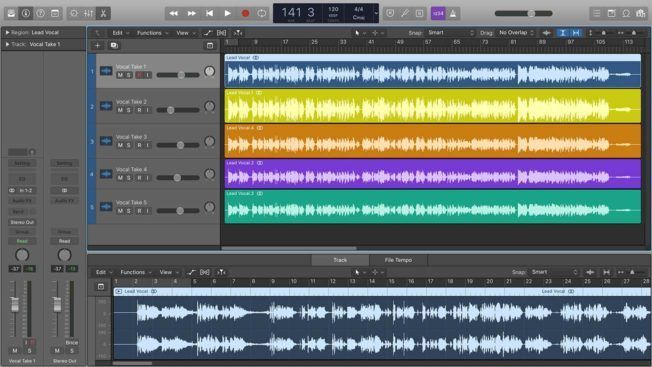
When recording vocals, the objective is to capture a good take for each section of the song. It usually requires multiple takes to nail a good performance.
Often, a recording session will have five main takes for each vocal part. Recording several takes helps the singer warm-up their voice and become comfortable singing the song.
On average, the last three takes are typically the best ones. Plus, it’s good to have multiple takes for later use. You may find creative ways to use them.
13. Give the Singer Feedback After Every Vocal Take

Communication is essential in the studio! It’s important to give constructive feedback to the singer after vocal takes.
Recording great vocals requires teamwork. Giving your vocalist feedback can make them feel comfortable and help them improve their performance.
14. Record Composite Takes to Create the Perfect Performance
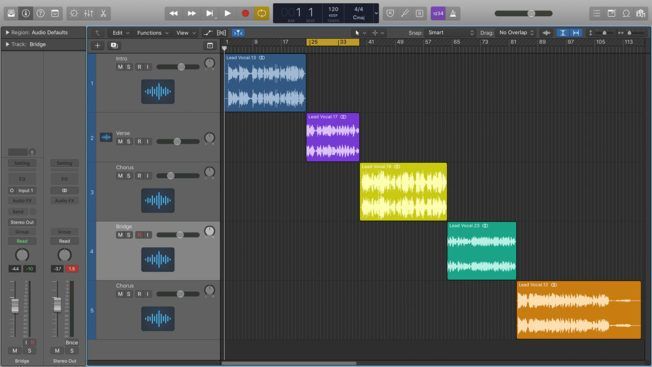
A flawless, one-take vocal performance is rare. Many producers record vocals section by section. This process is known as ‘comping,’ which is short for composite.
Have the vocalist run through their parts several times, even if they make mistakes. Keep the recording going. They’ll eventually nail that perfect take.
Next, choose the best takes and combine them to create one full composite track. Plus, it’s better to have too many takes than not enough for editing. You may find creative ways to use the other takes.
15. Know When to Add Audio Effects to the Vocal Track
One of the main decisions to make when recording vocals is to record ‘dry’ or ‘processed.’ Every producer will have a different process. There is no hard rule.
Generally, it’s good practice to track vocals dry and add audio effects later. Once you print the effects onto a track, it’s difficult to remove or edit them later on. Processed tracks are also harder to hear issues that may need editing.
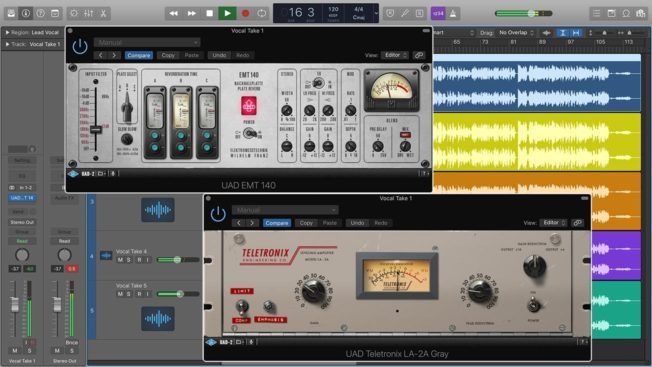
However, some producers prefer to add subtle amounts of compression and reverb to get the vocalist in the right mood.
Adding reverb can make the singer’s voice come alive. This method can help inspire the vocalist to sing their best. Reverb also smooths out the tiny distracting details of a voice. It can help your singer perform without focusing on small imperfections.
Adding compression can tame spikes and even out levels. Start with 2-4dB of gain reduction and a slow attack. This technique is helpful when recording a great singer with a lot of dynamics.
However, use compression with caution and don’t over-compress. You can always apply more vocal compression later in the mixing stage.
Some producers will also add an EQ during the recording. This technique helps remove or accentuate specific frequencies of the singer’s voice.
Conclusion
There are several other tips for recording vocals. However, these 15 techniques provide a great starting point for the recording process.
While using proper techniques is essential, it’s also important to follow your creativity. Over time, you will develop a process that works best for your recording sessions.
Have fun while recording vocals, and keep making great music!

MORE ARTICLES FROM THE ICON BLOG


