Music Production Workflow Tips
This guide offers music production workflow advice that will help you maximize productivity when creating music with Ableton Live.

Music Production Workflow
Developing a solid production workflow is essential when it comes to creating music. Improving your music production workflow will help you finish songs faster, stay organized, and advance your creative skills.
The following music production tips will help you improve your creative workflow and maximize productivity when producing music with Ableton Live.
Organization
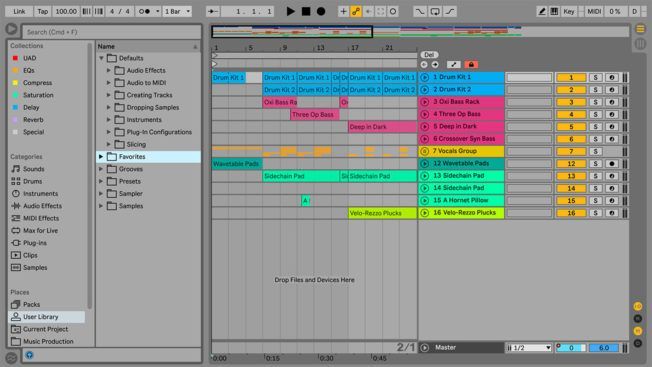
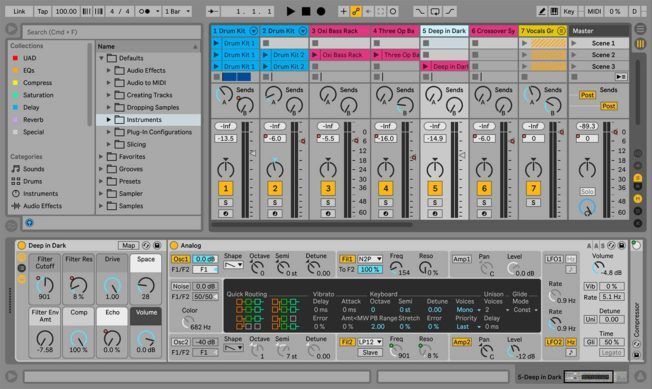
Organizing your sessions and User Library is essential for improving workflow and maximizing productivity. There are several ways to organize a project to help you maneuver tracks and arrangements quickly, conserve screen real estate, and save time. First, ensure your naming tracks so they are easily identifiable. Avoid the painful procedure of going through every track to find a particular sound. Second, group similar tracks. For example, organize all your drum tracks into a drum group. Third, color-code all your tracks, groups, and clips so you can quickly identify your sounds. Take color-coding even further by coming up with a scheme that will become familiar over-time. For example, use the same colors for certain tracks in every project such as red for drums, blue for bass, green for synths, etc. Furthermore, collapsing the grouped tracks will preserve screen real estate and help you navigate your project faster.
In Arrangement View, create locators and name them accordingly to the different parts of your song. For example, create launchable locators at the beginning of the intro, breakdown, verse, chorus, etc. This technique allows you to navigate the different sections of your song faster.
Finally, organize your User Library to maximize productivity. For example, create custom folders to organize your favorite samples, custom Racks, presets, instruments, Live Sets, and more. You will discover how much faster it is to work when you can pull in your favorite kick or Audio Effect Rack once everything is organized and accessible. Moreover, Live makes it easy to create folders and organize resources directly from the browser. Having a structured file structure is crucial to staying organized!
Create a Game Plan
Preparation and planning are vital to music production. Knowing what you want to achieve in a project will help you streamline the process. It’s important to figure out what genre you’re aiming for, what type of sounds you would like to include, and other aspects of the song. Also, you will save yourself a lot of trouble in the long run if you spend a little extra time preparing your project before you begin.
Fortunately, Ableton Live offers several ways to create various default presets and templates. Below are a few examples of how to prepare a project in Live:
Save Current Set as Default Creating a custom default template is a great way to save time, stay organized, and kick-start new projects with convenience. Default Live Sets also eliminate the repetitive and tedious tasks of setting up projects and devices every time you open a new Live Set. For example, create a template that includes your favorite Live devices and third-party plugins, return tracks, bus groups, track defaults, routing configurations, mixer settings, and anything else you find yourself repeatedly setting up.
Save as Default Track: If you use the same effects on all your audio or MIDI tracks, then save that configuration as a default. This approach saves time from having to load all the same devices, preset settings, and more each time you create a new track.
Default Presets: It quickly becomes monotonous having to dial in frequently used settings for particular devices and actions each time. Streamline your workflow by saving presets and/or creating folders in your User Library where you can save effects, instruments, third-party plugins, and Racks with your preferred settings.
- Live’s browser also has a selection of ‘Defaults’ folders already created. They allow you save presets that:
- Customize how Live responds to various user actions, such as sample dropping, slicing, and converting audio to MIDI.
- Cause newly-created MIDI and audio tracks to load with certain devices already in place, complete with custom parameter settings.
- Load VST and Audio Units plugins with specific parameters already configured.
Collections: Live 10 added a new Collections section to the browser. This feature allows you to tag browser items with up to seven colors. Each color can also be renamed. Collections make it easy to add all your favorite tools to a specific category. For example, you could tag all your favorite EQ plugins so they are available in an EQ Collections label.
Working with Reference Songs
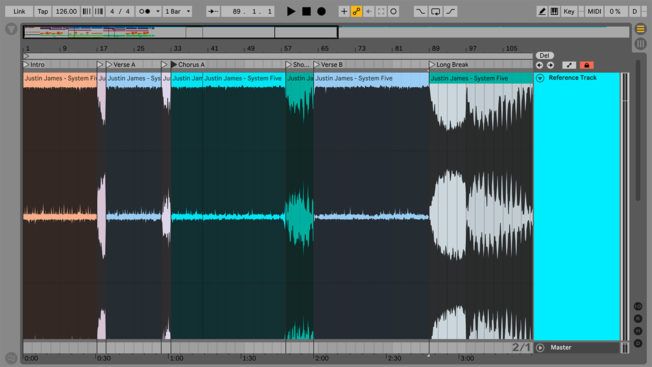
Arrangement is essential to the development of a project and is often one of the most troublesome processes. Learn to arrange your song more quickly by referencing the structure of another song. Simply drop in one of your favorite songs and use Live’s locators in Arrangement View to mark all the sections of that song. Mapping out a visual guide is super helpful and educational.
Moreover, reference tracks are extremely helpful for mixing. Comparing your mix with a professionally mastered mix helps you identify loudness, width, depth, and much more. This method also gives you an idea of how to treat various elements in the project and makes it easier to identify what’s needed to get everything sounding like a commercial release.
Try selecting a few reference tracks with a solid song structure and a quality mixed sound. Stacking your music against them will help you get the type of results you’re looking to achieve!
Separate the Creative Processes
With computer-based music-making, it’s easy to blur the lines between distinct parts of the creative process. Separating the different stages of music creation works incredibly well at improving workflow and reducing the need to rework various things. Moreover, jumping between creative tasks and logical tasks means that your brain is continually switching between two ways of thinking which makes it hard retain momentum. For example, it doesn’t make sense to get involved in engineering tasks such as mixing a track before finishing creative tasks like sound design.
Viewing the creation process as a set of tasks rather than one massive task is also more logical and less daunting. Try following a task-based approach that separates the different stages. For example:
Composition: Begin by developing melodic, harmonic, and rhythmic ideas. This stage is devoted to establishing the foundation of your song.
Arrangement: This process involves assembling a song structure. For example, this stage is where you develop the intro, verses, breakdowns, choruses, and other crucial parts of the song. The arrangement also includes adding and subtracting different elements throughout the track to build or reduce tension.
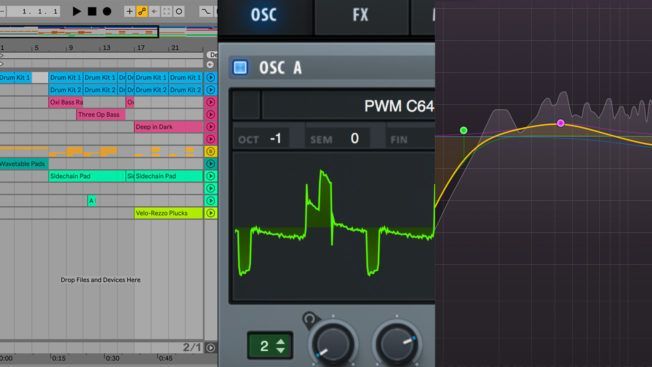
Sound Design and Production: This process involves creating unique sounds for your musical ideas. This stage gives your song its character and vibe. Also, it’s one of the more enjoyable processes! Try spending a day solely dedicated to sound design. For example, create a variety of bass sounds that will be available once you start building a track.
Production: This is the final stage before focusing on the sonic credibility of your song. The production process is where you fill in the arrangement with sound effects and ear candy, create transitions, and apply audio effects in creative ways. Furthermore, this is a good time to make key decisions and prepare for the mixing stage. For example, deleting unnecessary tracks and making final arrangement tweaks.
Mixing: Mixing is the process that brings out the best in your multitrack mix. This stage involves enhancing all the elements in a mix, fixing clarity and frequency masking issues, adjusting levels, panning, making final adjustments, and much more. Moreover, it’s where you sculpt your arrangement to make sense of all your tracks in relation to each other. The aim is to create a polished mix that stacks up to commercial releases.
Mastering: Mastering is the last creative step in the audio production process. The primary goal of mastering is to turn a fully arranged mix into a presentable musical product ready for distribution.
Take Notes

Taking notes is extremely helpful. Listen to your mix and write down everything you think still needs attention. For example, make the kick more punchy, give the transition into drop more energy, and tune the vocal.
It’s easy to get lost in a mix, that’s why a roadmap is essential for leading us in the right direction. Use your notes as a guide and the path to completion will become less vague.
Bonus Tip: Live’s Info View allows you to create your own info text for clips, tracks, and devices. Right-click (PC) or CTRL-click (Mac) any clip or track title bar and choose ‘Edit Info Text’ from the context menu. This method works great for adding notes or information about your project.
Final Thoughts
Everyone has their own approaches to creating music. These tips offer alternative methods to help you refine your approach to completing tracks much faster. They also provide efficient ways to help you work through writer’s block.

MORE ARTICLES FROM THE ICON BLOG


