How To Use Ableton Live 12 Vocoder On Vocals And Drums
This comprehensive guide dives into the depths of Ableton Live's powerful vocoder effect, showing you how to unlock its full potential on both vocals and drums. Whether you're aiming to craft that iconic robotic voice, add harmonic depth to your vocal melodies, or elevate your drum patterns with textural layers, this guide will walk you through the essentials. You’ll not only learn how to set up and configure the vocoder device step-by-step but also how to push its boundaries with cutting-edge features in Ableton 12, giving you creative, out-of-the-box techniques to transform your sounds into something truly unique. From tweaking formant shifts to layering snare drums with noise oscillators, the possibilities are endless—and this guide will ensure you're ready to explore them all.
ABLETON LIVE VOCODER OVERVIEW
Ableton Live’s vocoder remains a versatile tool for creating unique sound modulations, and with Ableton 12, its integration into workflows has been enhanced. The vocoder modulates one signal (the modulator) with the frequencies of another (the carrier), allowing you to create robotic vocals, harmonized melodies, and even gritty drum textures.
In Ableton 12, the vocoder maintains its classic functionality but with improved performance and smoother audio routing. This version also makes creating custom vocoder templates easier, allowing users to set up their favorite vocoder chains quickly.

VOCODER ON VOCALS
Modulating vocals to achieve the classic robotic sound is still a staple in Ableton 12, but now the setup is more streamlined, especially with customizable templates and routing shortcuts.
Steps to Set Up Vocoder on Vocals in Ableton 12:
- Load Vocoder on your vocal track.
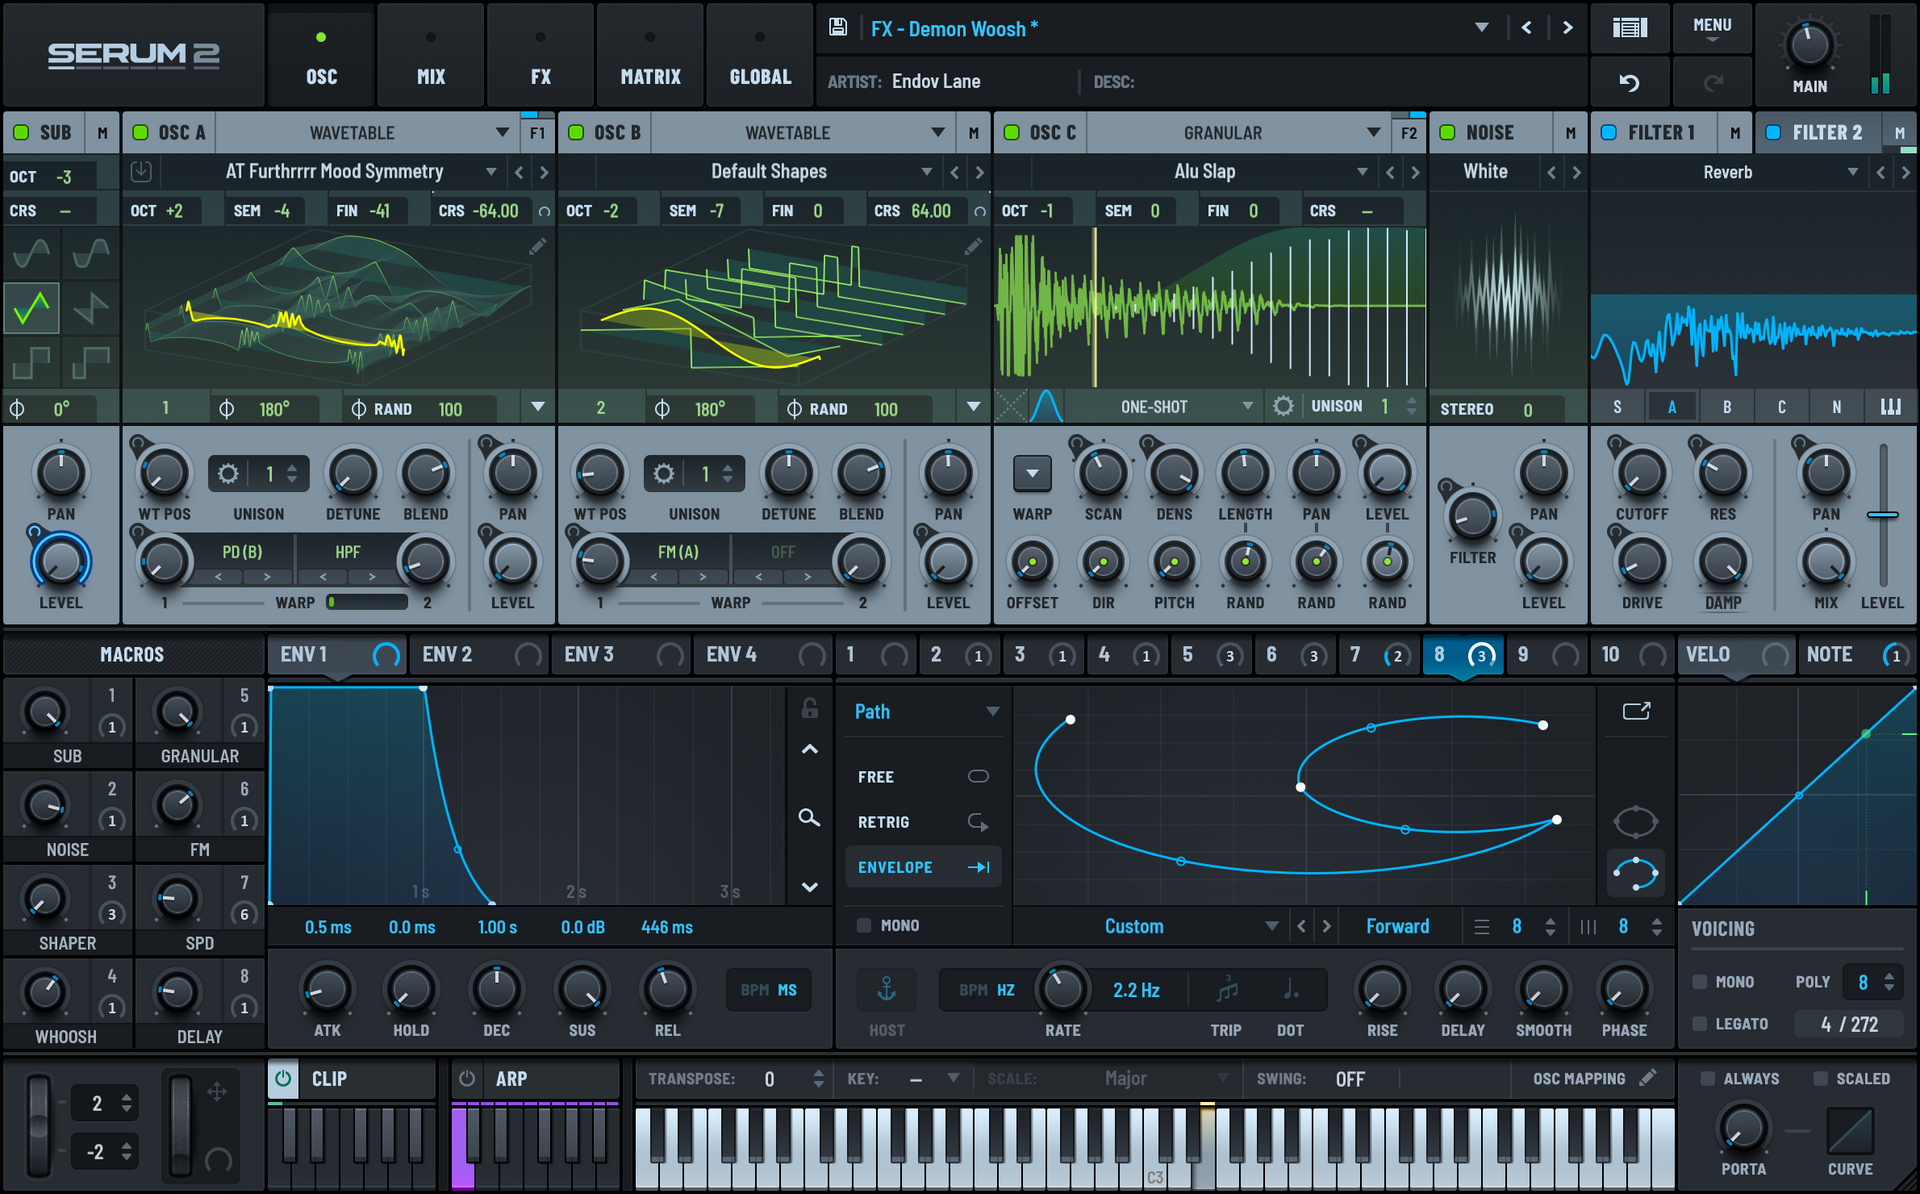
- Create a new MIDI track (Shift+CMD+T) and load a synth such as Operator or Serum.
- Draw MIDI notes (Shift+CMD+M) or record them live to control the synth. For best results, keep the notes in the same key as your vocals.
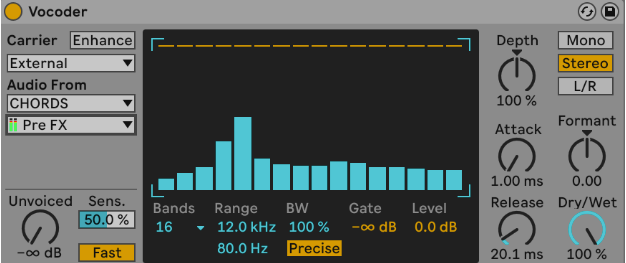
- On Vocoder, set Carrier to External and choose the synth track from the Audio From menu.
- Play both tracks together. You’ll hear the synthesizer shape the vocal timbre, transforming it into that distinct vocoder effect.
TIP: If your vocoded vocal sounds too mono and needs a bit more depth, you can add width in a couple of ways. First, go to the synth patch you’re using as the carrier and increase the unison and detune settings; this will spread the sound for a more stereo effect.
Alternatively, adjust the Depth control in the Vocoder. Moving the Depth slider further to the right increases the influence of the carrier signal, while moving it to the left emphasizes the modulator signal, which can create a unique blend and add richness to your vocal sound.
NEW FEATURE: Carrier routing improvements in Ableton 12 make the process smoother, with automatic routing suggestions based on your synth selection.
For extra clarity, try using harmonically-rich synth patches. Sawtooth waves or bright pads often produce the clearest, most powerful results.
PROCESSING VOCALS WITH VOCODER
The Ableton Live Vocoder offers a range of sound-shaping controls to help you fine-tune your effect. Experimenting with these controls can significantly enhance your results. Here’s a quick overview of some key features to explore:
- Enhance: Vocoder's output can sometimes lose high-end detail and clarity when using external carriers. Enabling the Enhance button improves brightness and restores clarity by normalizing the carrier’s frequencies and dynamics.
- Unvoiced: This control adjusts the volume of a noise generator that resynthesizes parts of the modulator signal. Increasing this adds brightness and definition to the sound.
- Filter Bank: The central display shows the levels of individual bandpass filters, allowing for quick adjustments by clicking and dragging each level. This effectively acts as an EQ, though using a separate EQ can provide more flexibility in shaping the sound.
- Bands: This setting determines the number of filters applied. Higher band counts produce clearer sounds, while fewer bands result in a more textured, distorted sound. In this example, 40 bands are set for enhanced clarity.
- Precise/Retro: Toggle between two filter types here. Precise mode offers a wider, fuller sound with increased bass presence, while Retro mode emphasizes higher frequencies, resulting in a narrower, brighter tone.
- Depth: This control determines how much of the modulator’s amplitude envelope affects the carrier signal. At 0%, only the processed synthesizer is heard, while at 200%, only the highest amplitude peaks of the modulator are audible. 100% provides a balanced, classic vocoder effect.
- Attack and Release: Attack controls how quickly Vocoder responds to changes in amplitude, and Release determines how long each filter band holds its amplitude before decaying.
- Formant: This control shifts the carrier's filter frequencies up or down. Lower values deepen the tone, creating a masculine quality, while higher values create a brighter, more feminine sound.
OUT-OF-THE-BOX VOCODER IDEAS FOR VOCALS
- Ambient Wash with Reverb and Delay: Send the vocoded signal to an auxiliary track with lush reverb and long delay settings, then bring up the reverb/delay level to taste. This trick creates an ethereal wash, turning vocals into a spacious, atmospheric pad perfect for intros, breakdowns, or transitions.
- Pitch-Controlled Chopping: Create rhythmic chops by routing your vocoded track through a MIDI-controlled gate or tremolo effect. Sync it to your song's tempo and set it to open at specific beats, producing a stuttering, pitch-based chopping effect that brings a fresh rhythmic layer to your mix.

VOCODER ON DRUMS
In Ableton 12, vocoder applications extend beyond vocals to drums, creating unique textures and enhancing drum sounds. The new Noise Carrier and improved Filter Bank controls allow for even more control over layered drum sounds.
Steps to Vocoder a Snare with Noise:
- Load Vocoder on a snare or hi-hat track.
- Group it (CMD+G) into an Audio Effect Rack, adding a parallel chain to mix dry and processed signals.
- Set Vocoder’s Carrier to Noise and adjust the X-Y display for different textures.
- Dial in the bands (8 works well for snares) and adjust Enhance, Formant, and Attack/Release for a tailored sound. This is a great technique to add a satisfying tail to your snare if it feels a bit too short or lacks presence.
CREATIVE USE CASES FOR DRUMS IN ABLETON 12
- Percussive Ambience: Use the Noise Carrier on a parallel drum track, but send it to a long reverb. This creates ethereal ambient tails for percussive sounds, perfect for lo-fi or experimental genres.
- Rhythmic Vocoder Drum Gating: In Ableton 12, use a vocoder with a MIDI-triggered gate. Set the vocoder’s carrier to a rhythmic synth or noise pattern, and it will modulate the drums in time, adding a complex, dynamic layer to the percussion.
CONCLUSION
The Ableton Live Vocoder in version 12 offers numerous ways to get creative with both vocals and drums. Beyond classic robotic vocals, its potential for dynamic automation, drum layering, and rhythmic modulation opens doors to endless sound design possibilities. Dive in, experiment, and unlock the power of the vocoder to add unique flair to your tracks.
Ready to master Ableton Live and start creating your own tracks? Explore ICON Collective's Online Music Production Intro Course and learn from industry pros. Build your skills with hands-on projects, expert mentorship, and an inspiring online community. Start your music journey today and bring your sound to life. Learn more...


