Sidechaining in Ableton 12: A Comprehensive Guide
What is Sidechaining in Music Production?
Sidechaining is a fundamental technique in music production where one audio signal influences the processing of another. Most commonly used in genres like electronic music, pop, and hip-hop, it allows producers to create space between competing frequencies, improve mix clarity, or add rhythmic effects.
New in Ableton 12: - Updates to Sidechaining Features
Ableton 12 introduces several enhancements to streamline sidechaining and improve compatibility with popular plugins, making it easier to set up, manage, and visualize sidechain effects.
Improved Sidechain Routing: Now, users can apply sidechain compression more efficiently on Group Tracks and buses, a major time-saver in the mixing process when applying effects to multiple tracks. This improvement also makes it easier to manage sidechain processing across an entire session.
Expanded Plugin Compatibility: With improved VST3 support, Ableton 12 ensures smoother sidechain integration with third-party plugins, allowing seamless compatibility with popular tools like Kickstart 2 and FabFilter’s Pro-C 2.
While the Compressor and Glue Compressor interfaces remain familiar, these routing and compatibility updates enhance the overall workflow and expand creative possibilities with sidechaining in Ableton Live 12.
One of the most significant updates in Ableton 12 is its improved sidechain routing and visual feedback, making it easier for producers to set up, control, and visualize the sidechaining effect. Key enhancements include:
- Enhanced Sidechain Interface: The sidechain controls within Ableton’s devices, such as the Compressor and Glue Compressor, have been updated for improved clarity, allowing faster setup and greater control.
- Sidechain in Group Tracks: Routing improvements make it easier to apply sidechain compression to group tracks or entire buses, saving you time during the mixing process.
- Expanded Plugin Compatibility: Ableton 12 ensures better sidechain support with third-party VSTs, enabling seamless integration with popular plugins like Kickstart 2, FabFilter, and others.
How to Sidechain in Ableton Live 12
Step 1: Load a Compressor on the Target Track
For traditional sidechaining, add Ableton’s Compressor to the track you want to duck in volume—such as a synth or bass that interferes with the kick or vocal. This track is the one that will react to the external signal.
Step 2: Access the Sidechain Section
Once the Compressor is loaded, toggle the sidechain button to reveal the external routing parameters. You’ll see two main sections:
- Audio From: Select the audio track that will trigger the compression (e.g., your kick drum).
- Sidechain EQ: Allows you to filter the input signal by frequency. This is useful for focusing only on certain frequencies (like the low end of a kick drum).
Step 3: Choose the External Source
In the Audio From dropdown, choose the track that you want to use as the trigger signal, such as a kick drum. In the second dropdown, select Pre FX to ensure the signal isn't affected by other effects.
Step 4: Adjust the Compressor
Tune the Threshold, Ratio, Attack, and Release to shape the sidechain effect. Aim for subtlety—setting the attack too fast can make it sound unnatural, while setting the release too long can create a pumping effect.
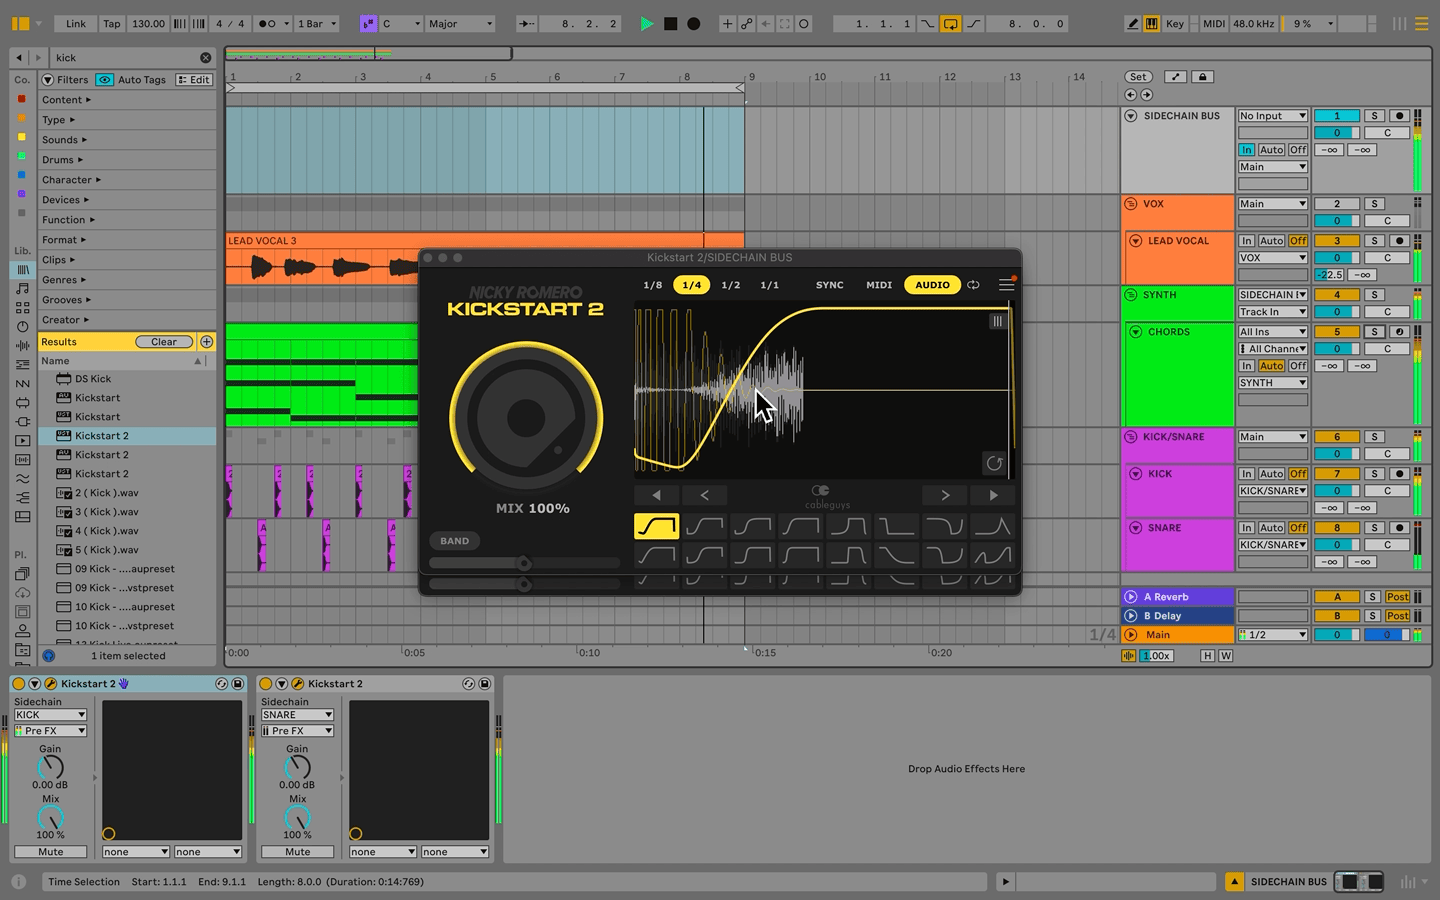
Using Kickstart 2 for Easy Sidechaining
If you're looking for a quick, creative way to set up sidechaining without manually adjusting a compressor, consider using Kickstart 2 by Nicky Romero. Like with Ableton’s compressor, you can route to Kickstart 2’s External Sidechain Output, but Kickstart 2 simplifies the process by offering preset shapes for the ducking effect. Adjusting the intensity is as easy as moving a single slider.
Creating an Efficient Sidechain Bus Template in Ableton 12
Setting up a dedicated sidechain bus is an effective way to simplify your sidechaining workflow, allowing you to route multiple tracks to a single bus rather than setting up individual compressors on each track. Here’s how to do it in Ableton 12:
Creating a Dedicated Sidechain Bus in Ableton 12
- Set Up a Dedicated Sidechain Bus:
- Add a new audio track and name it “Sidechain Bus.”
- In the track’s I/O section, set Audio From to “No Input” (or any empty input channel) since this track will act as a silent controller for your sidechaining.
- Insert your preferred sidechain tool, like Ableton’s Compressor, onto this “Sidechain Bus” to apply a global sidechain effect.
- Create a Sidechain Trigger Track:
- Create a new audio or MIDI track specifically for your sidechain trigger, such as a kick pattern.
- Use this track to input the rhythmic trigger (kick, snare, or any other percussive sound) that will control your sidechaining.
- Route the Audio From from each Compressor or Kickstart 2 instance on your “Sidechain Bus” to this dedicated trigger track.
- On the Sidechain Bus, set Monitor to “In” to keep the routing active without requiring actual audio output. (Note: you can only set Monitor to “In” once you’ve routed another track’s audio to it)
- Apply Sidechain Compression:
- On each group or individual track you want sidechained, route the audio output to your “Sidechain Bus.”
- Program your sidechain trigger pattern on the Trigger Track, then adjust the parameters of your sidechain tool (threshold, release, intensity, etc.) to fit the desired ducking effect.
- Save as a Template:
- Once your sidechain bus and trigger track are set up, go to File > Save Live Set as Template. Now, whenever you start a new project, your sidechain setup will be ready to go, saving time and ensuring a consistent workflow.
Advantages of Using a Sidechain Template
- Consistency: Ensures the same compression settings are applied across different sessions.
- Efficiency: Saves time by eliminating the need to set up sidechain routing repeatedly.
- Versatility: Allows you to easily switch out different trigger signals, like changing the rhythm of the kick without reconfiguring the routing.
Other Ways to Use Sidechaining in Ableton 12
Aside from traditional sidechain compression, you can also use sidechaining for creative sound design. Here are some creative applications:
- Sidechain Reverb and Delays: Apply sidechain compression to reverb or delay effects to prevent them from overpowering your main elements. This keeps the effects subtle and controlled.
- Rhythmic Sidechain for Pads and Leads: Use sidechain compression to create a pumping effect on pads or lead synths, giving them a rhythmic groove that syncs with the beat.
- Sidechain Multiple Frequency Bands: Utilize multiband sidechaining with Ableton’s Multiband Dynamics or third-party plugins like FabFilter Pro-MB to duck specific frequency bands rather than the whole sound.
Conclusion
Sidechaining is an essential tool in every producer’s kit. Whether you're using Ableton's built-in compressor, third-party tools like Kickstart 2, or setting up a sidechain template for an efficient workflow, mastering this technique will give your productions more clarity, energy, and professional polish.
Don't be afraid to experiment with sidechaining across different elements in your mix. The creative potential is immense, and with the new tools in Ableton Live 12, you'll find endless ways to shape your sound.
Ready to master Ableton Live and start creating your own tracks? Explore ICON Collective's Online Music Production Intro Course and learn from industry pros. Build your skills with hands-on projects, expert mentorship, and an inspiring online community. Start your music journey today and bring your sound to life. Learn more...

MORE ARTICLES FROM THE ICON BLOG


