How to Make a DIY Vocal Booth on a Budget
Learn how to build your own vocal booth that won’t break the bank. This step-by-step guide shows you how to make four cheap recording booths for your home studio.
WHAT IS A VOCAL BOOTH AND WHY DO I NEED ONE?
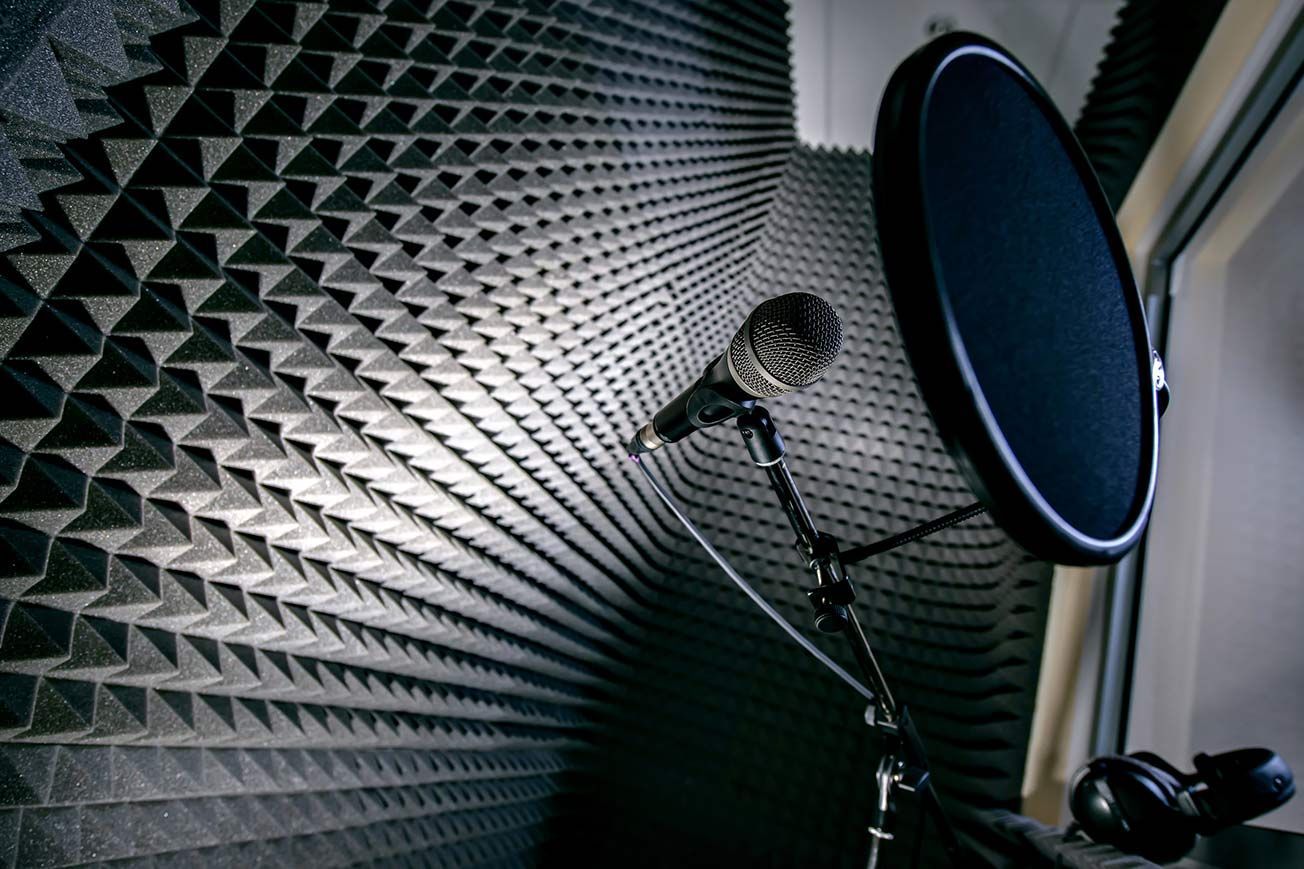
A vocal booth, also known as a sound booth or recording booth, is a specialized enclosure designed to minimize external noise and maximize sound quality. It is an essential component of a professional recording studio, allowing artists to record high-quality vocals and other sounds without distractions or interruptions.
When you record in an untreated room, sound waves bounce off surfaces, creating reflections and ambient noise that can compromise your recordings. A vocal booth helps to eliminate these room sound reflections, providing a controlled environment that enhances the clarity and quality of your vocal recordings. By isolating the microphone from external noise and unwanted sound reflections, a vocal booth ensures that your recordings are clean, dry, and professional-grade.
CHOOSING THE RIGHT LOCATION FOR YOUR VOCAL BOOTH:
When choosing a location for your vocal booth, it’s essential to consider the surrounding environment and potential sources of noise. Ideally, your vocal booth should be located in a quiet room with minimal external noise and few distractions. Avoid placing your vocal booth near windows, doors, or other sources of noise, as these can compromise the sound quality of your recordings.
Additionally, consider the size of the room and the placement of your vocal booth within it. A larger room can provide better sound quality, but may require more effort to treat the space. Ensure that the room has enough space to accommodate your vocal booth and recording equipment comfortably. By carefully selecting the right location, you can create an optimal recording environment that enhances the quality of your vocal recordings.
4 Cheap DIY Vocal Booth Options for Your Recording Studio
Full-sized commercial vocal booths are expensive. That’s why many artists opt to build a DIY recording booth for a fraction of the cost. They may not look as fancy but will do the job for your vocal recording needs!
Here are four budget-friendly DIY sound booth designs you can build in your home studio.
1. How to Build a Closet Vocal Booth
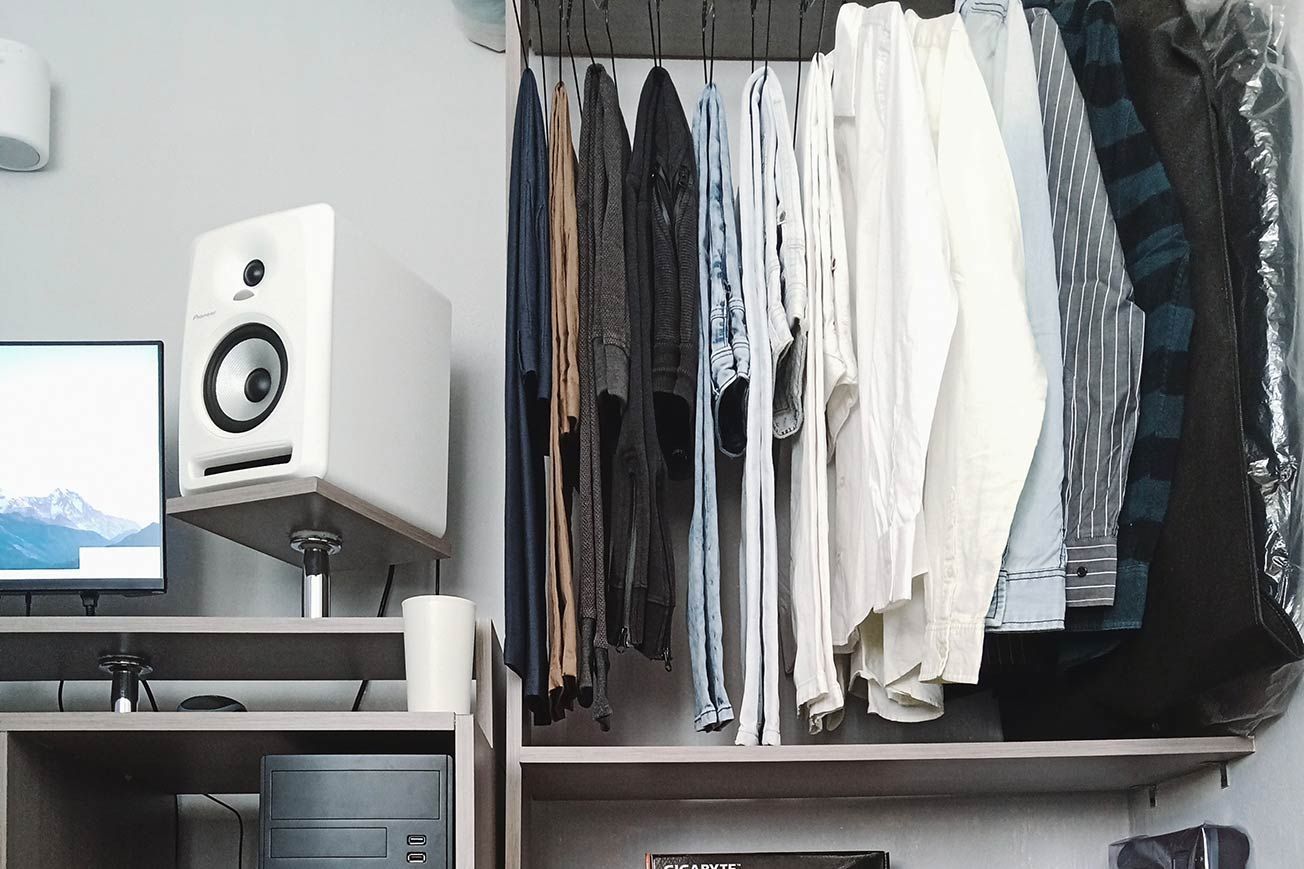
Transforming your closet into a vocal isolation booth is a cheap and easy option. However, closet vocal booths don’t always absorb sound reflections and room sound well. Your vocals will sound like they’re recorded in a tiny room rather than in a proper vocal booth.
What you need:
- Closet or small space with enough room for the vocalist and recording equipment.
- Dense material that absorbs and dampens sound waves. Examples include blankets, rugs, carpet, mattresses, pillows, egg-crate foam, acoustic panels, etc.
- Tacks, nails, adhesives, or drywall anchors to secure materials to the wall.
Step 1: Pick a Closet for Your Recording Booth
Start by choosing the closet or small space. You can use a bedroom closet, hall closet, linen closet, or pantry for this space. Ensure the area is big enough to fit one person and the recording equipment comfortably.
A medium-sized recording space works best. A closet too large or small can create problems that affect the quality of your recordings. For example, confined closets create issues from standing waves, early reflections, and low-frequency buildup. They don’t always provide the ideal recording space.
In contrast, large closets require more acoustic treatment to eliminate reflections, room reverb, and other issues.
Step 2: Prepare the Closet for Acoustic Treatment
Singing in front of your t-shirts will not provide adequate sound treatment. Cloths will absorb high-frequency sound waves but do little to reduce low-frequency buildup and room sound. For best results, clear out the space to prepare it for adding proper acoustic treatment.
Remove cloths, shelves, racks, and clutter to make ample space. Also, ensure the surfaces are flat before applying the acoustic treatment.
Step 3: Check the Lighting and Electrical
If the lighting in your closet is noisy, consider using LED lights or bulbs. LED is quiet and won’t make sounds the microphone could pick up.
Also, ensure you have a power source to run your recording equipment. If you don’t have a power outlet, consider hiring an electrician, or run an extension cord from a nearby outlet.
Step 4: Apply Acoustic Treatment
Acoustically treat the inside of the closet to create a sound booth. Cover the walls, floor, ceiling, windows, door, and other reflective surfaces.
For example, lay thick rugs or carpet on the floor if you have hard surface flooring. Next, cover the walls with dense absorbent material. Use thick blankets, rugs, carpet, mattresses, egg-crate foam, or acoustic panels. You will need tacks, nails, or adhesive to secure the materials to the walls. Lastly, consider hanging blanks, towels, or other absorbent material from the ceiling if needed.
For best results, try to cover most hard surface areas. You may have to experiment with different materials and rooms until you achieve the optimum result.
2. How to Build a Mattress Vocal Booth
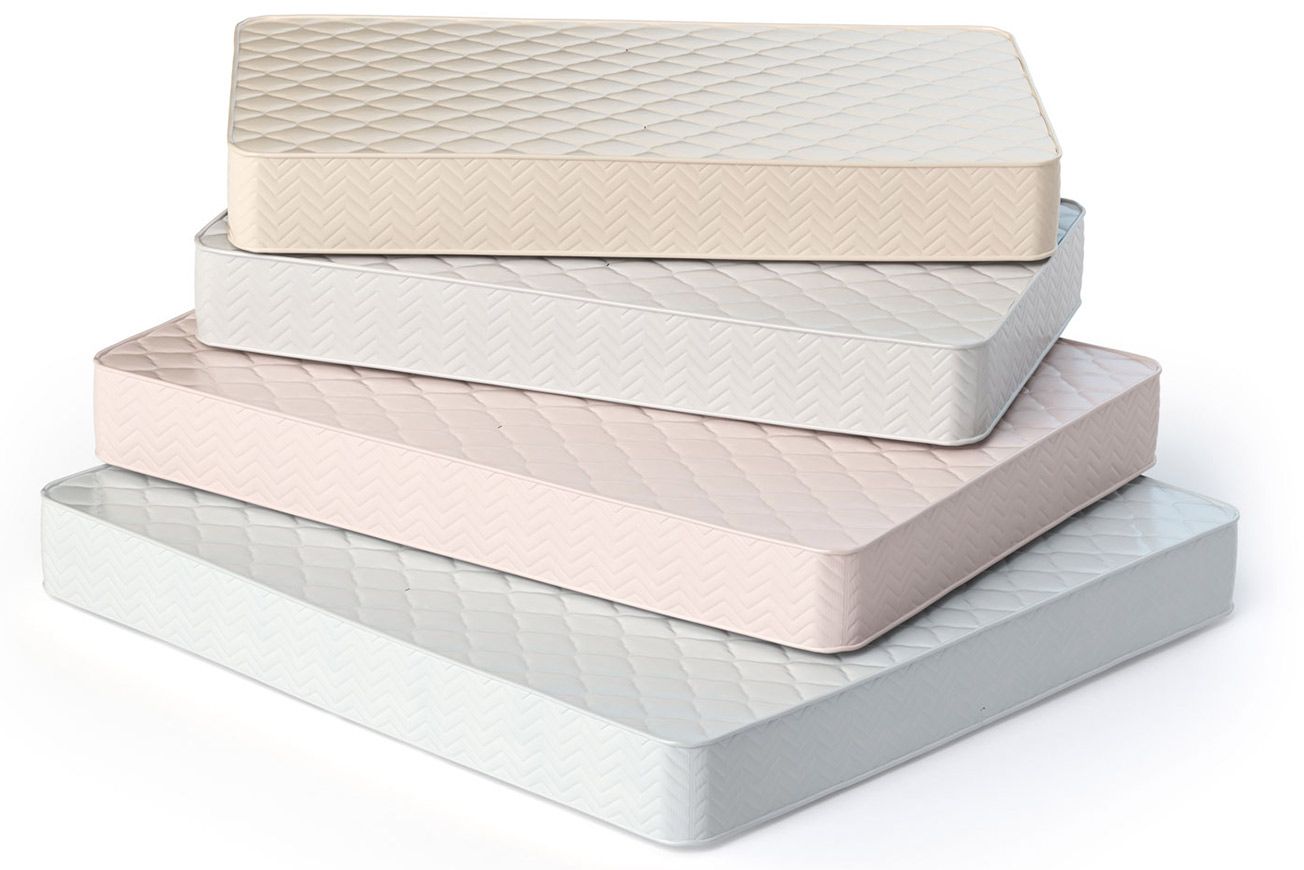
The mattress fort is the easiest DIY vocal booth. You surround yourself with mattresses to absorb sound reflections and room sound. The drawback is mattresses are a pain to stack and store.
This cheap vocal booth alternative also provides better isolation and absorption than the closet method. The extra thick material of a mattress will dampen and absorb more frequencies in the mids and low-mids. As a result, your vocal recordings will sound more balanced.
However, the effectiveness of a mattress booth depends on the design and the mattresses. For example, thicker materials like memory foam work better than a box spring mattress.
What you need:
- One to four mattresses. Memory foam mattresses work better than box springs.
- Dense material to absorb and dampen sound waves. For example, blankets, rugs, carpet, etc.
Step 1: Build Your Mattress Vocal Booth
The design will vary on how many mattresses you have. Any of the following configurations will work:
- One mattress – Position it behind the singer’s head.
- Two mattresses – Arrange them in a “V-shape” behind the singer’s head.
- Three mattresses – Arrange them in a “C-shape” behind the singer’s head.
- Four mattresses – Create a four-sided vocal booth or add the fourth mattress on top of your “C-shape” design.
Step 2: Add Sound Absorbing Material as Needed
If your vocal booth is on hard flooring, consider laying a thick rug or carpet. Also, consider placing dense material above the singer’s head for maximum isolation and dampening.
3. How to Build a Blanket Vocal Booth
The blanket booth is one of the best all-around DIY vocal booths. However, it will cost you more than the previous two solutions.
Also, there are several ways to make a blanket recording booth. Check online for various guides and blueprints. However, this example looks at building a PVC pipe frame for hanging several acoustic blankets.
The PVC vocal booth design gives you full isolation with sound-absorbing material on all sides. Though, it won’t provide the same sound absorption as a vocal booth with proper acoustic treatment.
Moreover, the blanket vocal booth is semi-portable. You can assemble and disassemble it easy depending on the design. You can also get as complex or simple as you like with this booth.
Note : You can download a FREE copy of these blueprints and size calculator from the Musician on a Mission website.
What you need:
- 4 acoustic blankets or dense packing blankets
- 7 (1-inch) PVC pipes
- 14 (1-inch) PVC tee joints
- 8 (1-inch) 90-degree PVC elbow joints
- 24 shower curtain rings
- 1 mini hacksaw to cut the PVC pipes
- 4 (2-inch) clamps (optional)
Step 1: Figure Out the Dimensions of Your Vocal Booth
Before you get started and buy the material, figure out the size of your booth. Find the dimensions that work for your recording space. Next, enter the width and length dimensions into the size calculator.
This crucial step determines how many PVC pipes, curtain rings, and blankets you’ll need.
Step 2: Build the Frame of Your Vocal Booth
Follow the blueprints to save time and frustration. Start with the base of the frame and then build the upper half. Also, cut your PVC pipes at the right lengths. Then label each pipe to make assembly easier.
If you get your materials from a hardware store, ask them to cut the pipes to the custom lengths. It will save you lots of time! If not, use a tape measure and a Sharpie to measure out the lengths yourself. Then use the mini hacksaw to cut each pipe length.
Important : Cut the pipe in a straight line. Straight edges will make the booth sturdier.
Step 3: Hang the Acoustic Blankets
Before you hang the blankets, connect the shower rings to the blanket grommets. This step will make the process easier.
Next, hang three acoustic blankets from the upper frame pipes. Attach them on the outside of the frame, not the inside. They will conform to the frame’s shape better this way. Also, overlap two blankets to create a door.
Lastly, drape the fourth blanket over the top of the booth. Cover the area evenly. Then use the clamps to fasten down the slack to the edges of the frame.
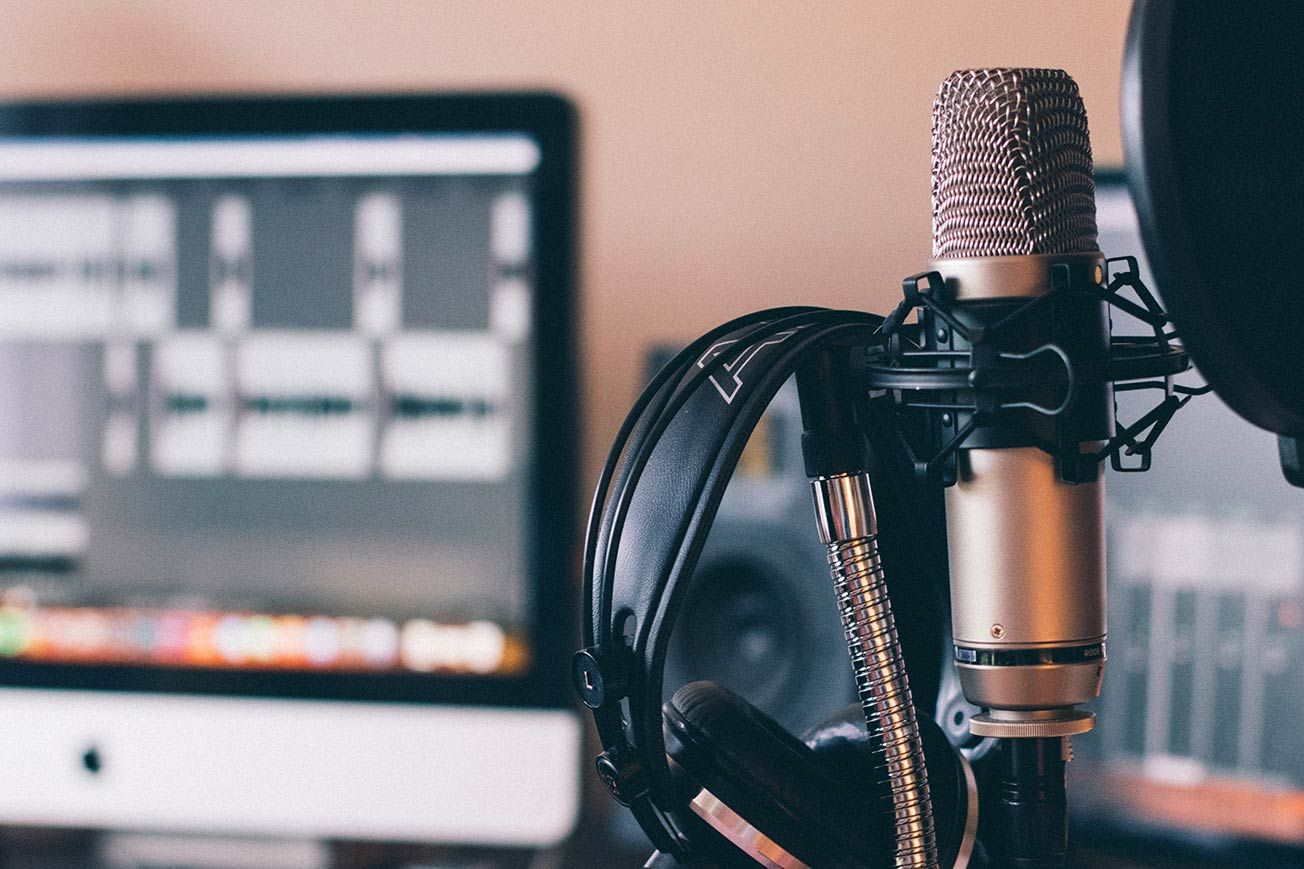
4. How to Make a Portable Vocal Booth

There are several ways to create a portable desktop DIY vocal booth. This design consists of a box lined with dense absorbing material. It’s intended to sit on a desk and isolate the microphone like a reflection filter.
You can even get clever with this design and make it foldable for easy storage and portability.
What you need:
- A medium-sized cardboard box or plastic storage container. Make sure it’s big enough to place a microphone and mini stand inside.
- Dense sound-absorbing material. Egg-crate foam, acoustic foam, memory foam, or a convoluted mattress work great.
- Spray adhesive, adhesive velcro, double-sided tape, or nuts and bolts to secure the foam to the inner box walls.
- A utility knife to cut the acoustic foam.
Step 1: Cut the Acoustic Foam Panels
Measure the inner walls of the cardboard box or plastic storage box. Next, cut five acoustic foam panels to the appropriate size. They will cover the entire inside of the box.
Before you attach the panels, make sure they fit. Insert the back panel first. Then measure from the panel to the outer edges of the box to determine the length for the other four panels. Also, consider cutting the two side panels shorter to fit between the top and bottom panels.
Step 2: Attach the Acoustic Foam to the Inside of the Box
Spray the entire inside of the box with adhesive. Then attach the back panel first, top and bottom second, and the side walls last.
Step 3: Sep up Your Microphone
Place your microphone and desktop stand inside of the box.
SOUNDPROOFING TECHNIQUES FOR A VOCAL ISOLATION BOOTH
Soundproofing is a critical component of building a vocal isolation booth. To achieve optimal sound quality, you’ll need to minimize sound reflections and prevent external noise from entering the booth. Here are some soundproofing techniques to consider:
- Use Acoustic Foam: Line the walls and ceiling of your vocal booth with acoustic foam or other sound-absorbing materials. This helps to dampen sound reflections and reduce echo.
- Install a Floating Floor: A floating floor can decouple the booth from the surrounding environment, preventing vibrations and external noise from entering the booth.
- Use a Vapor Barrier: A vapor barrier can prevent moisture from entering the booth, which can compromise the sound quality.
- Seal Gaps and Seams: Use soundproofing caulk or other sealants to seal any gaps and seams in the booth. This prevents sound from escaping or entering the booth.
- Consider a Portable Vocal Booth: If you don’t have the space or budget for a permanent installation, a portable vocal booth or DIY recording booth can be a great alternative. These booths are easy to set up and can provide excellent sound isolation.
By incorporating these soundproofing techniques into your vocal booth design, you can achieve professional-grade sound quality and take your recordings to the next level.
Do I Need a DIY Vocal Booth?
It’s essential to control the recording environment surrounding your microphone to achieve the best results in vocal recording. Seasoned engineers will tell you the environment you record in is as important as your gear.
When recording in an untreated room, sound waves reflect off surfaces and bounce around the room. The room will also have natural reverberation. This creates a problem because the microphone will pick up the sound wave reflections, room reverb, and other noises. These problematic noises affect the quality of your vocal sound.
A vocal booth or acoustically treated room will improve the sound quality of your recordings. The acoustic treatment will dampen and absorb unwanted noise, ambiance, room reverb, and reflections. Eliminating unwanted noise and reflections will make your vocal takes sound clear, dry, punchy, and balanced. This approach will also make editing your vocals easier!
However, different music production situations will require varying degrees of vocal quality. If you want to capture high-quality vocal recordings, consider building a vocal booth. Or, at a minimum, use dense, uneven acoustic materials to dampen and absorb reflections around the microphone.
Conversely, if you’re not concerned with vocal quality, you may not need a vocal booth. Though, it’s difficult to make a poor vocal sound great – even if you have the best plugins and pro editing skills.
When people listen to a song, they pay attention to the vocals the most. That’s why it’s vital to record the best-sounding vocals.
A DIY vocal booth is an excellent option for recording in a less-than-ideal environment. A treated space will improve the sound quality of your recordings by absorbing and diffusing unwanted noise. It will also isolate the microphone from the surrounding area, eliminating problematic noises the microphone will pick up.
By improving your room acoustics and recording techniques, you will get the highest quality vocal sound. Plus, improving the quality of your vocal takes will make editing easier!
Read more: Discover 5 common mistakes new music producers make and learn how to improve your music production skills. Get essential tips for beginners and avoid critical errors in your music productions.

MORE ARTICLES FROM THE ICON BLOG


