How to Improve Your Mix with Field Recordings and Foley
What are field recordings? And, what is foley? Learn how to transform recorded audio of everyday sounds into unique samples for your music projects.
What are Field Recordings?
Field recordings are recordings captured outside the studio. The recorded material can be both natural and human-produced sounds. For example, sounds of water, wind, birds, noisy crowds, traffic, machines, dropping a cup, etc. Everything makes a sound! Moreover, field recordings are one of the most creative ways to design unique sounds and textures for your projects.
What is Foley?
Foley is the reproduction of real-world sound effects. Foley sound effects are added to films, television, video games, music projects, and other media in post-production to enhance audio quality. For example, footsteps, clothes rustling, doors opening, glass breaking, etc. Foley also adds realistic sounds and textures to your music. The term is named after Jack Foley, an innovative Sound Editor at Universal Studios in the 1920s.
How can Field Recordings and Foley Improve Your Mix?
Adding field recordings and foley to a project is a trending technique in modern music production. Using realistic sounds in your mix adds dimension, character, and creates a compelling sound. They also provide an organic palette of interesting source material that can inspire new rhythmic or sonic ideas.
Collecting field recordings and foley also gives you a diverse library of sounds no one else has. For example, what does it sound like when you pour water over a glass on fire? Would layering this captured material with a snare add character and make it punchy? You could also use the sound of a hammer hitting wood as a percussive layer. These types of experimental processes and interaction with objects often yield exciting results.
Furthermore, adding real-world sounds to your mix evokes emotion and adds authentic qualities. For example, layering ocean waves in a tropical house track that has a summer vibe. Hearing the waves in the background fills out the mix. They also help you envision enjoying the song on a beach.
Check out this song from ICON Collective Alumni SoPhilthy. He uses a field recording of vinyl with crackles and pops to add texture. It also adds background ambiance and gives the song an extra layer of interest. He also uses a bird recording and real-world sounds as percussion.
How to Capture Field Recordings and Foley
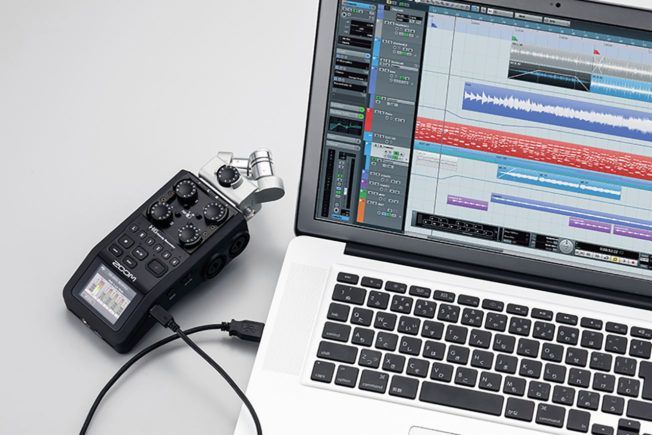
Record field recordings and foley using anything from your smartphone to a high-quality recorder such as a Zoom H6. You can also find countless recordings online to download. Many downloadable sample packs also include field recordings and foley loops. For example, Cymatics compiled an Ultimate List of Free Foley Sound Effects.
What should you record? The answer is anything that makes a sound. With the advent of DAW’s and numerous plugins available, any sound can be used to create something new. The best way to know what works is to experiment! You’ll often discover new and exciting sounds that you would have never thought to use.
How to use Field Recordings and Foley in Your Mix
The technique involves capturing raw material and editing it into usable samples for your music productions. These types of recordings are not as noticeable as prominent sounds. Some describe these recordings as hidden sounds. When listing to a song you may not notice them. That’s until you remove them and realize how much they added to the mix. In addition, they typically play in the background at low volumes or layered with other sounds.
Below are some examples of how artists use field recordings and foley in their projects:
- Use field recordings to create background atmosphere, ambiance, drones, and soundscapes. These sounds are often played at low volume levels. They make a song sound more full while also filling the gaps between beats. They also add rich texture, emotion, and provide an evolving foundation for other song elements. For example, try adding a recording of rain at low volume sidechained to the kick.
- Layering foley and field recordings with drums and percussion. Adding a unique sounding percussive recording to dull or average samples makes a huge difference. It makes them sound more interesting, fatter, and punchy. Layering organic sounds also adds character and gives you a tone no one else has. For example, layer the sound of broken glass with an average snare to make it pop!
- Add percussive elements to your beats. Foley and field recordings make great percussive sounds. For example, record the sound of a rock hitting a metal sheet. Then, cut a short portion of the recording and fill in the off beats of a rhythm section.
- Create sound effects and transition effects. Foley and field recordings make awesome sound effects. For example, record a car passing by on the street. Reverse the recording, add a fade that ramps upward, and process it with effects to create a riser.
- Layer with synths to add complexity and punch. Layering pads and leads with foley and field recordings is a great way to make them unique. For example, layer future house chord stabs with a recording of a lawnmower. Try pitching up the sound, time-stretching it, editing with EQ, and adding chorus and reverb. Next, layer it with your chord stack and process the group of sounds together to create a cohesive mix. This move fills out the sound, adds texture, and gives it character.
- Create a custom instrument. Try loading Ableton Live’s Simpler or Sampler instrument with a foley recording of a gunshot. Next, transpose the sound to a higher pitch, process it, and create a melody using the new tone.
How to Process Field Recordings and Foley
Once you’ve collected some source material, import the raw audio into your DAW and begin processing. Either transform the source material into something usable and amazing or leave it dry. You drive the creative decisions! You’ll soon develop a creative process for making samples.
Below is a list of ways you can manipulate the captured audio in Ableton Live :
- Time warping with Live’s Warp feature . Stretch the audio to make something new and unrecognizable.
- Transposing the audio . Pitch the audio up or down.
- Equalizing to remove problematic frequencies, boost pleasant frequencies, and remove clicks or pops.
- Modulate with various audio effects . Apply chorus, flanging, phasing, or an LFO to add movement.
- Apply spatial audio effects . Create movement and dimension with delay and reverb.
- Control dynamics with compression or limiting . Tame rogue transients and balance dynamics.
- Add harmonics with saturation or distortion . This move thickens the sound, adds character, and rounds off sharp transients.
- Layer with other sounds . Layer drums, percussion, synth leads, pads, and anything else to enhance them.
- Chop or slice the audio to create smaller, usable pieces of the recording. This moves also makes it easier to edit and manipulate parts.
- Reverse the audio to create effects, transitions, swelling pads, ghost notes, etc.
- Use Live’s ‘Convert Audio to MIDI’ or ‘Convert Drums to New MIDI Track’ feature . This move allows you to slice and resequence parts of the recording.
- Sidechain sustained sounds like pads, soundscapes, or drones. This move cleans up the mix and controls conflicting frequencies.
- Load Live’s Simpler or Sampler with a recording to create a custom instrument.
- Apply automation to add movement, control effects, or introduce variation.
- Auto pan sustained sounds to add movement and stereo width. Also, pan various hits to create separation.
- Gate sounds to control tails or create rhythmic effects.
Conclusion
It’s amazing how many sounds we hear every day and the ways to use them in music production. Thinking outside the box with your music will take your creativity to the next level.

MORE ARTICLES FROM THE ICON BLOG


