How to Export Audio and Video in Ableton Live
Learn how to export audio in Ableton Live. Get a better understanding of all the render settings for both Arrangement View and Session View.
Ableton Live ’s Export Audio/Video command allows you to render audio as new sample files. Rendered audio files can be a full-length song, single tracks, or a looped range of time. Rendered audio can be used for mastering, stem mixing, online streaming, backups, listening, and other reasons.
Though exporting audio in Live is easy, there are some decisions to make as part of the process. This guide looks at Ableton Live’s exporting options.
How to Export Audio in Ableton Live
Exporting audio from Live can be done from both the Arrangement and Session Views. All the export settings are accessible from the File menu’s Export Audio/Video command.
The Export Audio/Video command also provides settings for exporting video. You can even upload your exported audio files to your SoundCloud account.
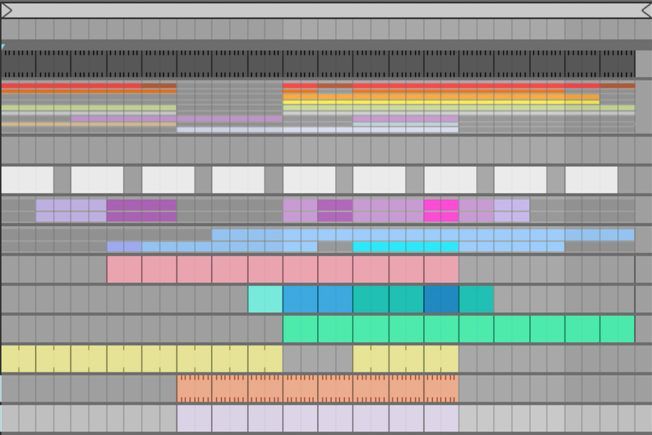
Exporting from Arrangement View
Exporting audio from the Arrangement View is the most common method. This view makes it easier to render a full song or its separate tracks. The process is simple:
- Set a loop brace along the full length of the song by dragging the Loop Start and Loop End points into position. You can also set a loop brace for a specific time range. Also, ensure the Loop End point does not cut off any effect tails from reverb or delay.
- Make sure to unmute all the tracks you want to render. Also, stop any launched Session View clips. An orange Back to Arrangement button indicates active Session View clips. Clicking this button makes Live play everything in Arrangement.
- Choose Export Audio/Video from the File menu or use the shortcut Shift+Cmd+R [Mac] or Shift+Ctrl+R [PC].
- Set your preferred rendering settings and click Export. Next, choose the location to save the exported audio. Click Save and the rendering process will begin.
Exporting from Session View
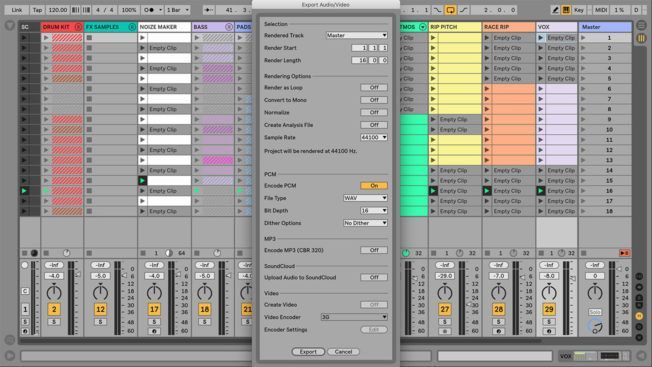
Live will export all clips with activated clip launch buttons when exporting from Session View. Ensure to launch all the clips you want to export before following these steps:
- Make sure to unmute all the tracks you want to render. Also, check the Back to Arrangement button to ensure there are not any active Arrangement View clips.
- Choose Export Audio/Video from the File menu or use the shortcut Shift+Cmd+R [Mac] or Shift+Ctrl+R [PC].
- Set your preferred rendering settings and click Export. Next, choose the location to save the exported audio. Click Save and the rendering process will begin.
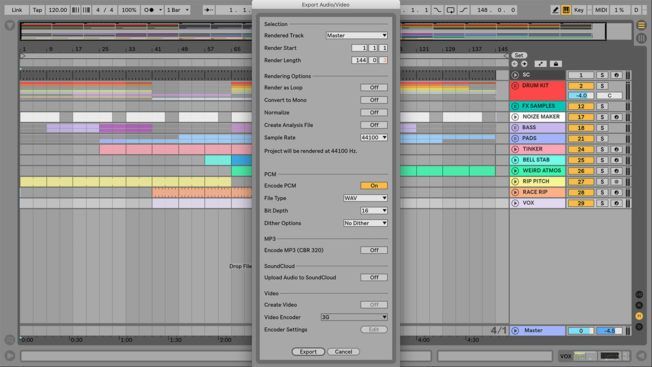
Export Audio/Video Settings
The export settings define the results of rendered audio. Below are brief descriptions of the various options.
Selection Options
- Master: Exports Live’s Master output. This option renders every activated track not muted.
- All Individual Tracks: Renders each track to separate audio files, including return tracks. They will all have the same length, making it easy to align them in multitrack programs.
- Selected Tracks Only: Renders a separate audio file for all the tracks selected before opening the export dialogue.
- Single Tracks: Renders the output of the selected track. This option is great for exporting stem files for each track.
- Render Start: Enter the sample start time where rendering will begin. The fields are in bars, beats, and sixteenths.
- Render Length: Enter the length of the rendered sample in bars, beats, and sixteenths.
Rendering Options
- Render as Loop: Activate to create a sample loop that includes any effect tails.
- Convert to Mono: Activate to create a mono file instead of a stereo file.
- Normalize: Activate to render the audio at max volume. The file will no longer have headroom. Deactivate this option if you plan on mastering your song.
- Create Analysis File: Activate to create a .asd file that contains analysis information about the rendered sample. Check this option if you intend to use the new sample in Live.
- Sample Rate: Select a sample rate for the rendered audio. 44,100 Hz is CD-quality and good for most applications. It’s also recommended to set the same sample rate as your project for mastering.
Encoding Options
- Encode PCM: Activate to create a lossless audio file. Lossless formats use compression algorithms that preserve audio data. It’s less destructive then compressed lossy formats.
- File Type: Pick WAV, AIFF, or FLAC format.
- Bit Depth: Set the same bit depth as your project for mastering. Or, choose 16-bit if you plan to burn an audio CD or stream the file online.
- Dither Options: Dithering adds a small amount of noise to the rendered audio. The process minimizes artifacts when converting to a lower bit depth. Moreover, dithering is a process applied to the final render. Don’t dither if you plan on mastering your song or processing the file further. Below are the available dither modes:
- Triangular: The “safest” mode to use if you plan on doing further processing.
- Rectangular: This mode introduces the smallest amount of dither noise, but at the expense of quantization error.
- Pow-r: These three modes offer increasing amounts of dithering, but with the noise pushed above the audible range. Use the Pow-r modes for the mastering stage. They work best on the final render.
MP3 Options
- Encode MP3: Activate to create a 320 kbps MP3 file.
SoundCloud Options
- Upload Audio to SoundCloud: Activate to launch an application that allows you to upload your exported audio file to SoundCloud.
Video Options
- Create Video: Activate to create a video file in the same directory as your rendered audio. This option is available if you have video clips in Arrangement View.
- Video Encoder: This chooser provides a selection of video encoder options. The choices depend on the encoders you have installed.
- Video Encoder Settings: This button opens the settings window for the selected encoder. These settings will vary depending on the chosen encoder.
Conclusion
Do you plan on sending your track out for mastering? It’s best to check which render settings the mastering engineer prefers. Also, try exporting some audio with different render settings to hear the differences.

MORE ARTICLES FROM THE ICON BLOG


