Ableton Live: Parallel Processing Tips
Icon Instructor Paul Laski takes you into Ableton Live and demonstrates how to create parallel processing racks to enhance your music.
What Is Parallel Processing?
Parallel processing involves duplicating an audio signal one or more times and processing each copy of that signal differently. This technique is achieved by literally duplicating an audio track and then putting a different effect on the duplicated version. However, this technique is more commonly implemented in DAWs by using Return tracks or Aux busses. For example, you could take a drum loop, send a copy of it through a Return track in Ableton Live loaded with a compressor, and then compress the living heck out of the copy. This technique is often referred to as parallel compression or New York compression.
What Is Serial Processing?
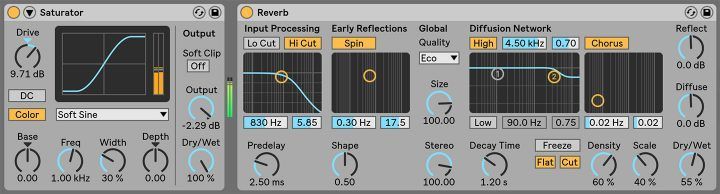
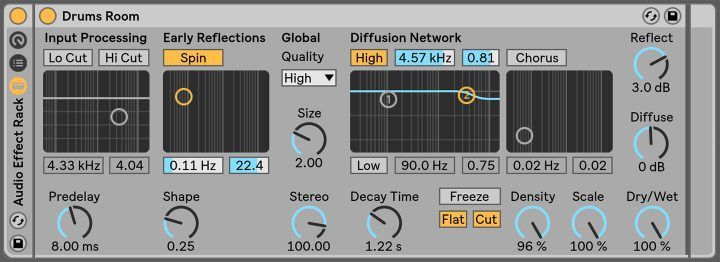
Parallel processing is different from series processing. This approach involves using a single instance of an audio signal and passing it through one or more effects that are inserted one after the other (in series) directly on the audio track. The image above shows an example of series processing. Here, a lead synth passes through Live’s Saturator device and followed by the Reverb. The synth sound will get distorted by the Saturator first. Then, this newly distorted version of the lead passes through the Reverb. As a side note, when processing in series, the order of the effects is quite important. Depending on the intensity of the effects in your insert chain, you can hear drastically different results when re-ordering them.
Parallel Processing in Ableton Live
Parallel processing can be achieved in Live using a variety of techniques. One common approach is to feed audio to a chain of effects on a Return track using track Send controls. Another approach is to simply use an audio effects Dry/Wet control to dial in the effect. This technique is technically parallel processing because it balances the dry unaffected signal with the wet, processed signal. Another approach would be to use Live’s powerful Audio Effect Racks and Chains to route audio through a variety of effects.
Parallel Processing Using Dry/Wet Controls
An audio effect’s Dry/Wet control adjusts the balance between the processed and dry signals. This convenient feature allows us to apply an effect without completely changing the original sound source. For example, let’s say I want to add some reverb to a drum loop to simulate the drums playing back in a room. I could place the reverb directly onto the drum loop track as an insert and then adjust the Dry/Wet control until it sounds good.
This technique works out OK, but there are potential issues. For example, I want the drums to maintain the punch and impact that the original dry loop offers. However, I start to lose that clarity and punch as I turn the Dry/Wet control closer to the ‘Wet’ side. Any Dry/Wet control will inherently turn down the Dry level while turning up the Wet level (and vice versa). For better or worse, there will always be some give and take with this approach.
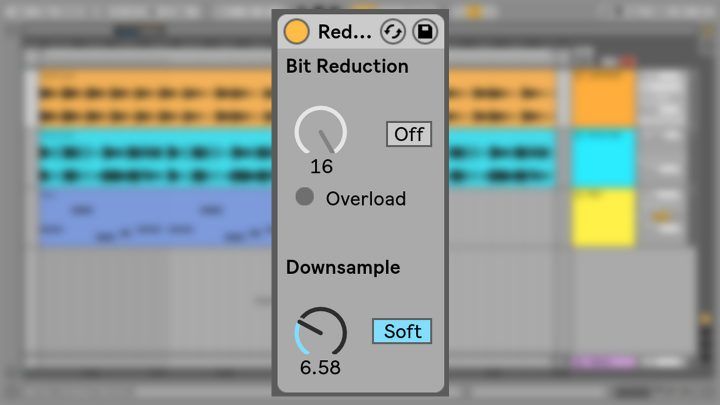
Another potential issue is that not every audio effect has a Dry/Wet control to begin with! For example, Live’s Redux device does not feature a Dry/Wet control.
Parallel Processing Through Audio Effect Rack Chains
Let’s try applying reverb to the drums again, but this time with an Audio Effect Rack and its parallel chains. First, select the Reverb device and click Command+G (Mac) or Control+G (PC) to place the Reverb inside an Audio Effect Rack.
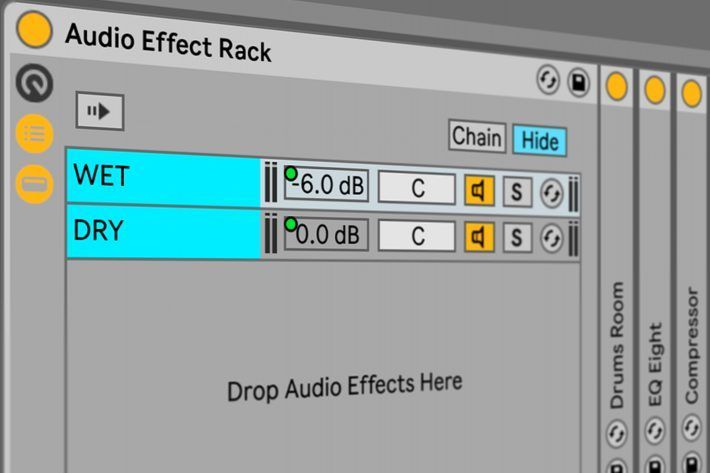
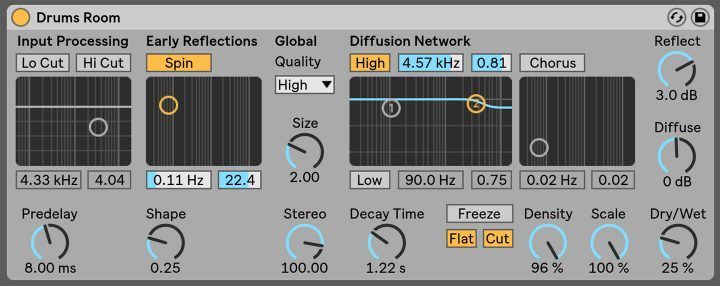
Next, open the Rack’s Chain List by clicking Show/Hide Chain List button located on the left side of the Rack. The Chain List displays parallel device chains that split the incoming signal as it enters a Rack. Currently, there is only a single chain created being processed by reverb. We must create an additional chain to split the signal so we can apply proper parallel processing.
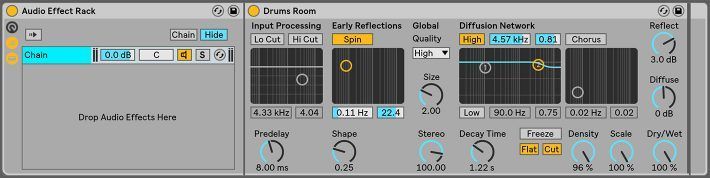
Create another chain for the dry signal by right-clicking or Command-Clicking (Mac) anywhere in the Chain List and selecting ‘Create Chain’ from the context menu. We now have two parallel copies (chains) of the drum loop. One layer is affected by a 100% Wet Reverb, and the other is completely unaffected.
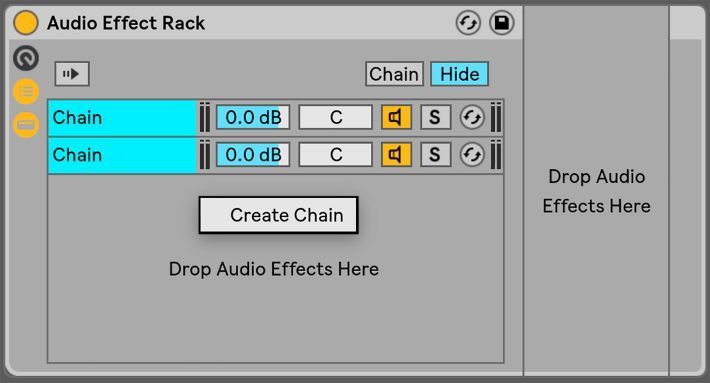
It’s also worth noting that each separate chain has its own Chain Volume slider control. We can use these sliders to balance the volume levels of the Dry and Wet copies of the drum loop independently. In other words, you can add in the Wet, reverb signal of the sound WITHOUT reducing the level of the Dry signal. Again, this technique allows you to keep the punch and impact of the original. It also gives you more control over how much of the processed signal is being applied. Furthermore, to avoid confusion, rename each chain using the Command+R (Mac) or Control+R (PC) key command to make edits.
The Power of Racks
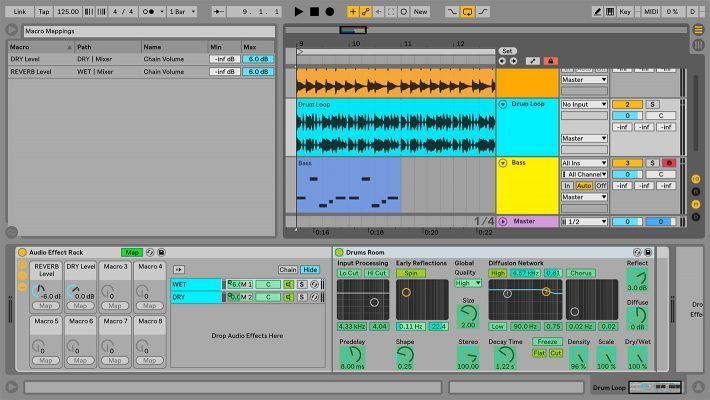
Parallel processing within an Audio Effect Rack opens up several benefits. First off, Rack’s feature Macro controls. In this example, I mapped the Chain Volumes to Macros 1 and 2 for quick access.

Moreover, you can set minimum and maximum levels for these Macro controls by clicking the Macro Map Mode button on the Rack’s Title Bar. This feature gives you access to Live’s Mapping Browser, which allows you to make level changes.
You can also assign Macro controls to a Push 2 or other MIDI controllers for intuitive hands-on control.
Furthermore, Audio Effect Racks are extremely flexible. You can add additional processing chains, route audio in creative ways, streamline your device chain by bringing together your most essential controls, and much more. The sky’s the limit! Lastly, you can save custom Audio Effect Racks into your User Library to recall in future projects.
More Practical Examples
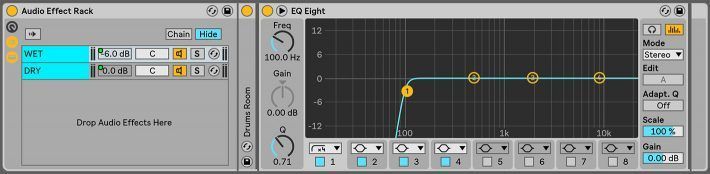
Audio Effect Racks are easily expandable. For example, using the parallel reverb rack example above, you can process the Wet chain further with some EQ or compression. I often like to EQ out any low frequencies on reverb by simply dragging and dropping an EQ Eight directly onto the Wet chain. This approach will add the effect after the reverb.
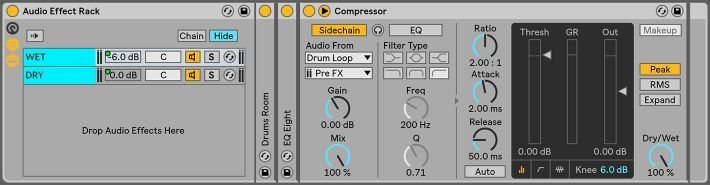
Another idea might be to add a sidechain compressor to the Wet chain. One effective approach is to use the Dry signal to trigger sidechain compression on the Wet chain. Using the sidechain routing on Live’s Compressor, select the Dry chain as the sidechain key input. This technique makes the reverb duck in level whenever the Dry chain sounds. For example, this technique is handy when you want the punch of the drums to cut through the mix, then have the reverb fill in the space around each hit.
Parallel chains in Audio Effect Racks can also be powerful sound design tools. Bear in mind that you don’t always have to use Dry and Wet chains in your Racks. Easily create layered sounds by affecting two or more parallel chains completely differently, causing each chain to sound either drastically varied or subtly nuanced.
I sometimes like to layer my bass sounds by passing them through two parallel Audio Effect Rack chains. One chain contains a Utility device, which I’ll use to make the signal monaural by enabling the Mono button.
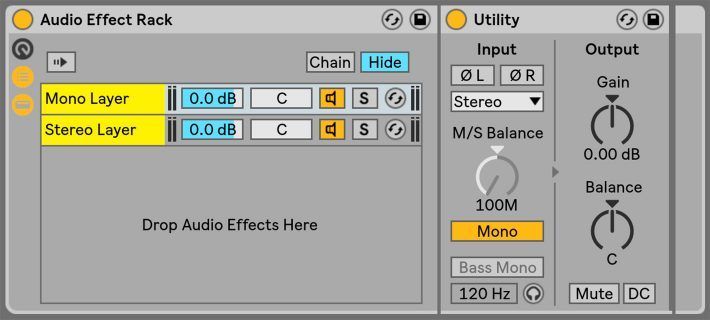
The other chain might have a wide Chorus or Reverb effect to add some stereo dimension to the bass. I can also add an EQ to this chain to clean out the low end if needed.

Wrapping It Up
I could potentially go on and on with other creative examples for using parallel Audio Effect Rack chains! But alas, I must end this post for today. Now that you’re armed with this knowledge, it’s up to you to come up with your own ideas for parallel processing. If you have any ideas or parallel racks you’d like to share with us, we’d love to hear about them!

MORE ARTICLES FROM THE ICON BLOG


